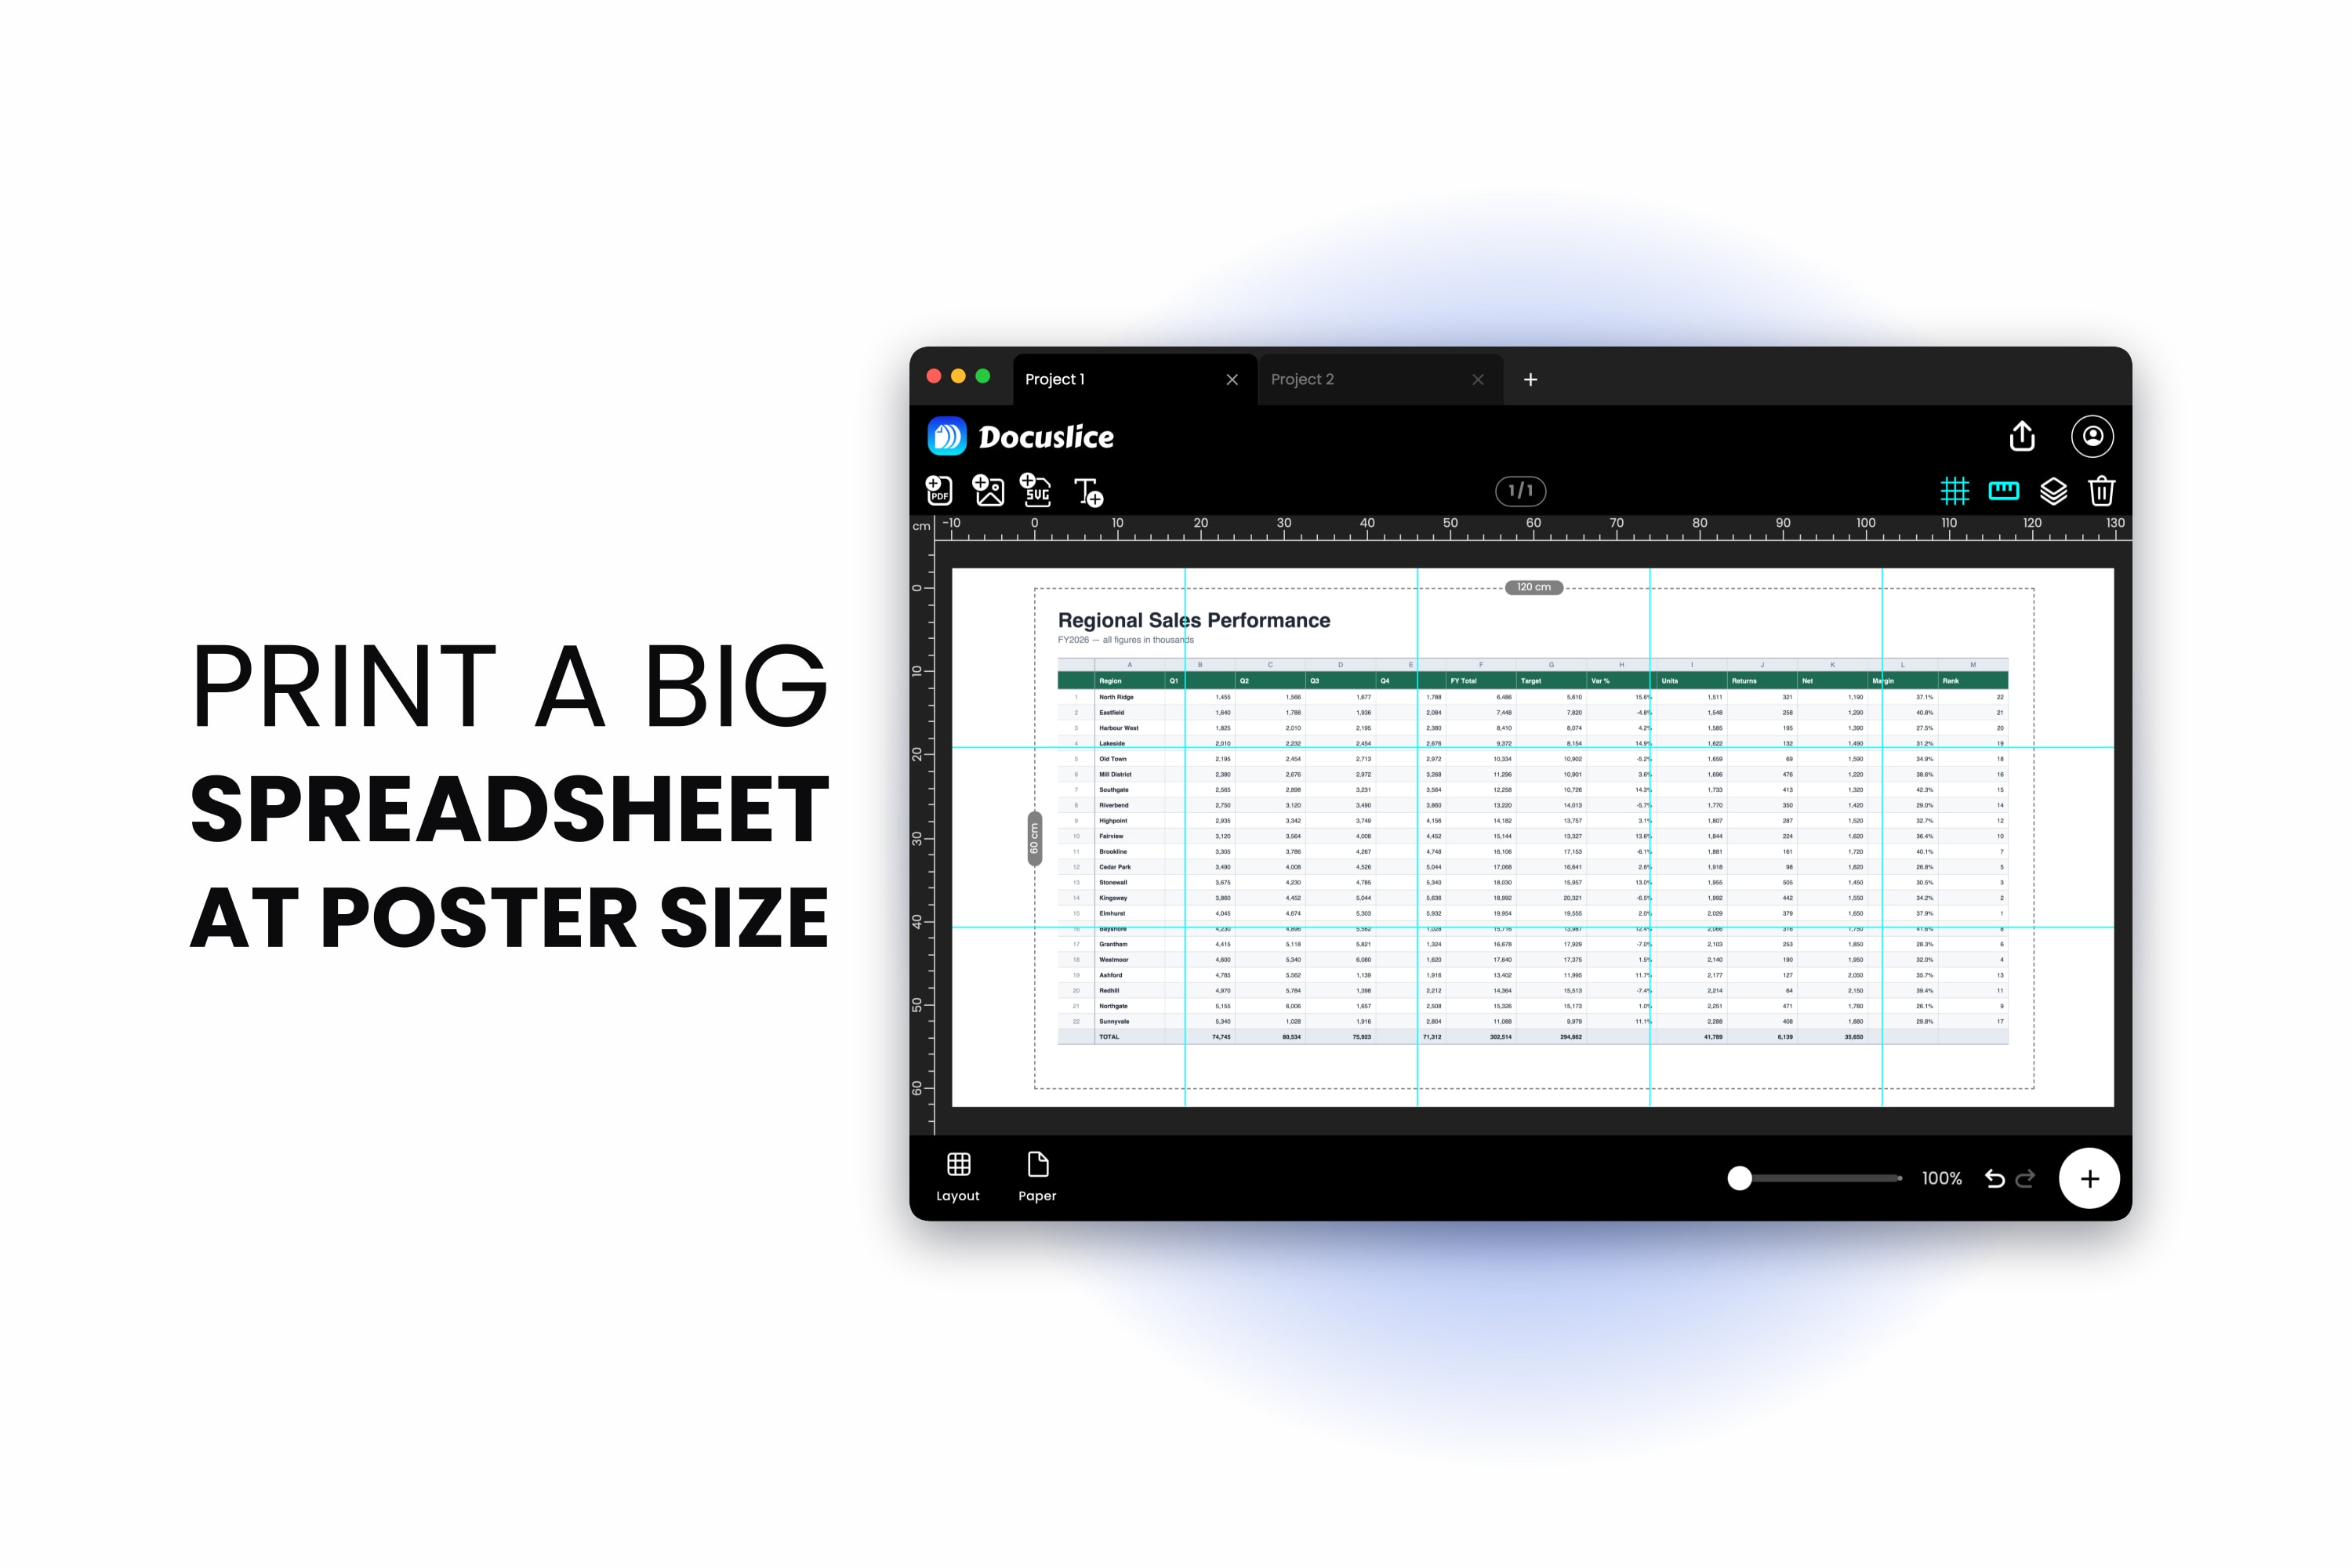
A wide spreadsheet against a printer is a fight most people lose the first few times. Columns fall off the right edge onto orphan pages, the header row appears on page one and nowhere else, and the printed stack makes no sense.
Excel handles all of this well, and here is the whole setup — plus the one job it cannot do.
Start in Page Break Preview
Start with View tab > Page Break Preview to see what Excel is currently planning.
This walkthrough is the desktop app, Windows or Mac. Excel for the web can preview and print, but has no Page Break Preview, no way to add or move page breaks, and no Print Titles — for print setup, use the desktop app.
The sheet redraws with blue lines at every page boundary and a large grey page number on each page.
- Dashed blue lines are breaks Excel worked out for itself.
- Solid blue lines are breaks that have been set manually.
- Drag any line to move the break. The moment you drag an automatic break it becomes a manual one.
- Drag a break outward to fit more onto a page and Excel scales the whole sheet down to make it fit — the classic "why did my printout come out microscopic".
The menu items live on the Page Layout tab under Breaks: Insert Page Break at the selected cell, Remove Page Break, and Reset All Page Breaks.
If you inherited the file, start with Reset All Page Breaks. Stale manual breaks are the most common reason a sheet paginates strangely.
One caveat: Microsoft documents that manual page breaks may not take effect while the sheet is on Fit to scaling — which is what the Width and Height boxes in the next section switch on. Under Fit to, Excel works out the pagination itself. Manual breaks are a tool for Adjust to percentage scaling, so choose one or the other.
Fit the width to one page and let the height run
The most useful print setting in Excel, and the one people most often get wrong.
On the Page Layout tab, in the Scale to Fit group:
- Set Width to 1 page.
- Leave Height on Automatic.
- Leave the Scale box alone — it greys out once Width or Height is a page count rather than Automatic, and that is correct.
Every column lands on one page width, the rows continuing down as many pages as they need — almost always what you want from a long table.
Do not use "Fit Sheet on One Page" in the print settings: it squeezes both dimensions onto one sheet, and on a real spreadsheet the result is unreadable.
Two things to watch:
Excel will scale further than is sensible. It goes down to 10%, and below roughly 60% most printed spreadsheets stop being readable. If Width: 1 page pushes the scale that low, narrow the columns, drop the font a point, turn on wrap text, or hide columns that do not need printing.
Try landscape first. Page Layout > Orientation > Landscape. A wide table on landscape A4 often needs no scaling at all.
Repeat the header row on every page
Page four with no column headings is useless. Freeze Panes does not help — it is screen-only and has no effect on printing.
The control you want is Page Layout tab > Print Titles, which opens the Page Setup dialog on its Sheet tab:
- Rows to repeat at top — click the collapse button and select your header row, or type
$1:$1directly. For a two-row header,$1:$2. - Columns to repeat at left — the same idea for a wide table whose first column labels each row. Typically
$A:$A.
Two gotchas that look like the feature is broken:
- Print Titles is greyed out while a chart is selected, while you are editing a cell, or if no printer is installed — the three conditions Microsoft documents. Click a normal cell first.
- The setting is per worksheet, not per workbook. And if several sheet tabs are selected together, the Rows and Columns boxes inside the dialog are unavailable until you click a single tab to ungroup them.
Set the page order
When a sheet is both wider and taller than one page, Excel decides whether to work down the rows or across the columns first, and it changes how the printed stack reads.
Open the Page Setup dialog — the small arrow in the corner of the Page Setup group on the Page Layout tab — and go to the Sheet tab, under Page order:
- Down, then over prints all the rows of the first block of columns, then moves right to the next block. This is the default.
- Over, then down prints across the full width first, then moves down.
For a long table one page wide this makes no difference. For a wide table with several column blocks, "Over, then down" keeps each horizontal band together.
Set the print area and tidy the page
A few more settings:
- Print area. Select the range, then Page Layout > Print Area > Set Print Area. Without it Excel prints everything it considers used, often including empty cells once touched.
- Centre it. Page Layout > Margins > Custom Margins > Center on page > Horizontally. Stops a narrow table hugging the left edge.
- Gridlines and headings. Page Setup > Sheet tab. Tick Gridlines to print the cell borders, and Row and column headings if the reader needs cell addresses.
- Page numbers in the footer. Insert > Header & Footer, then insert Page Number and Number of Pages. A twelve-page printout without them reassembles badly.
- Error display. Page Setup > Sheet tab lets you print cell errors as blank instead of
#N/A, worth doing for anything you are handing to someone.
Check it before you commit
File > Print shows a full preview with page navigation at the bottom. Page through all of it, looking for orphan columns at the end, header rows missing after page one, a scale too small to read, and breaks falling mid-group.
View > Page Layout lets you edit the sheet with margins, headers and footers visible — useful for the last fixes.
That is the complete Excel print setup. There is no reason to use anything else for it.
The one printing job Excel cannot do
Everything above makes a spreadsheet readable across a stack of pages — each printed sheet a page of a document, read one after another.
Tiling is a different job: making many sheets into one large picture, taped together and hung on a wall.
Excel cannot do the second one. Its scaling range tops out well short of poster size, there is no overlap between pages, no cut marks, no way to say "make this two metres wide", and page boundaries fall on cell edges. Not a criticism — Excel's print engine is built for documents, and it is good at them.
You hit the gap with a Gantt chart that has to go on a wall, a chart at genuine poster size for a presentation or shop floor, a PDF export that now needs to be larger than the paper, or a dashboard legible from three metres away.
Excel vs Docuslice
| Feature | Microsoft Excel | Docuslice |
|---|---|---|
| Spreadsheet readable across a stack of A4 pages | ✅ | ❌ not its job |
| Repeat header rows on every printed page | ✅ Print Titles | ❌ |
| Control exactly where the page breaks fall | ✅ Page Break Preview | ❌ |
| Fit all columns to one page width | ✅ Scale to Fit | ❌ |
| Choose the order the pages come out in | ✅ down or over | ❌ |
| Many sheets taped into one large picture | ❌ | ✅ |
| Print artwork larger than the paper | ❌ scaling tops out | ✅ any wall size |
| Overlap between sheets | ❌ | ✅ presets 25–100% |
| Trim guides | ❌ | ✅ cut lines + scissor marks |
| Numbered tiles for assembly | ❌ | ✅ Column & Row or Sequence |
| Set an exact finished size | ❌ | ✅ mm, cm, m, in, ft |
| Set the sheet count directly | ❌ | ✅ grid mode |
Nothing here replaces Excel's print setup. If your output is a spreadsheet, everything you need is in Excel.
Printing an Excel chart or PDF at true poster size
Get the artwork out of Excel and tile it.
Step 1 — Get it out of Excel
- A chart: right-click it and choose Save as Picture. Click the chart's border so the whole chart is selected rather than an element inside it, or the option does not appear.
- A sheet or a workbook: on Windows, File > Export > Create PDF/XPS Document; on Mac, File > Save As (or File > Export) and choose PDF. Set the print area and Scale to Fit options first — the PDF is built from your current print setup, so everything above still applies.
Step 2 — Open it and pick your paper
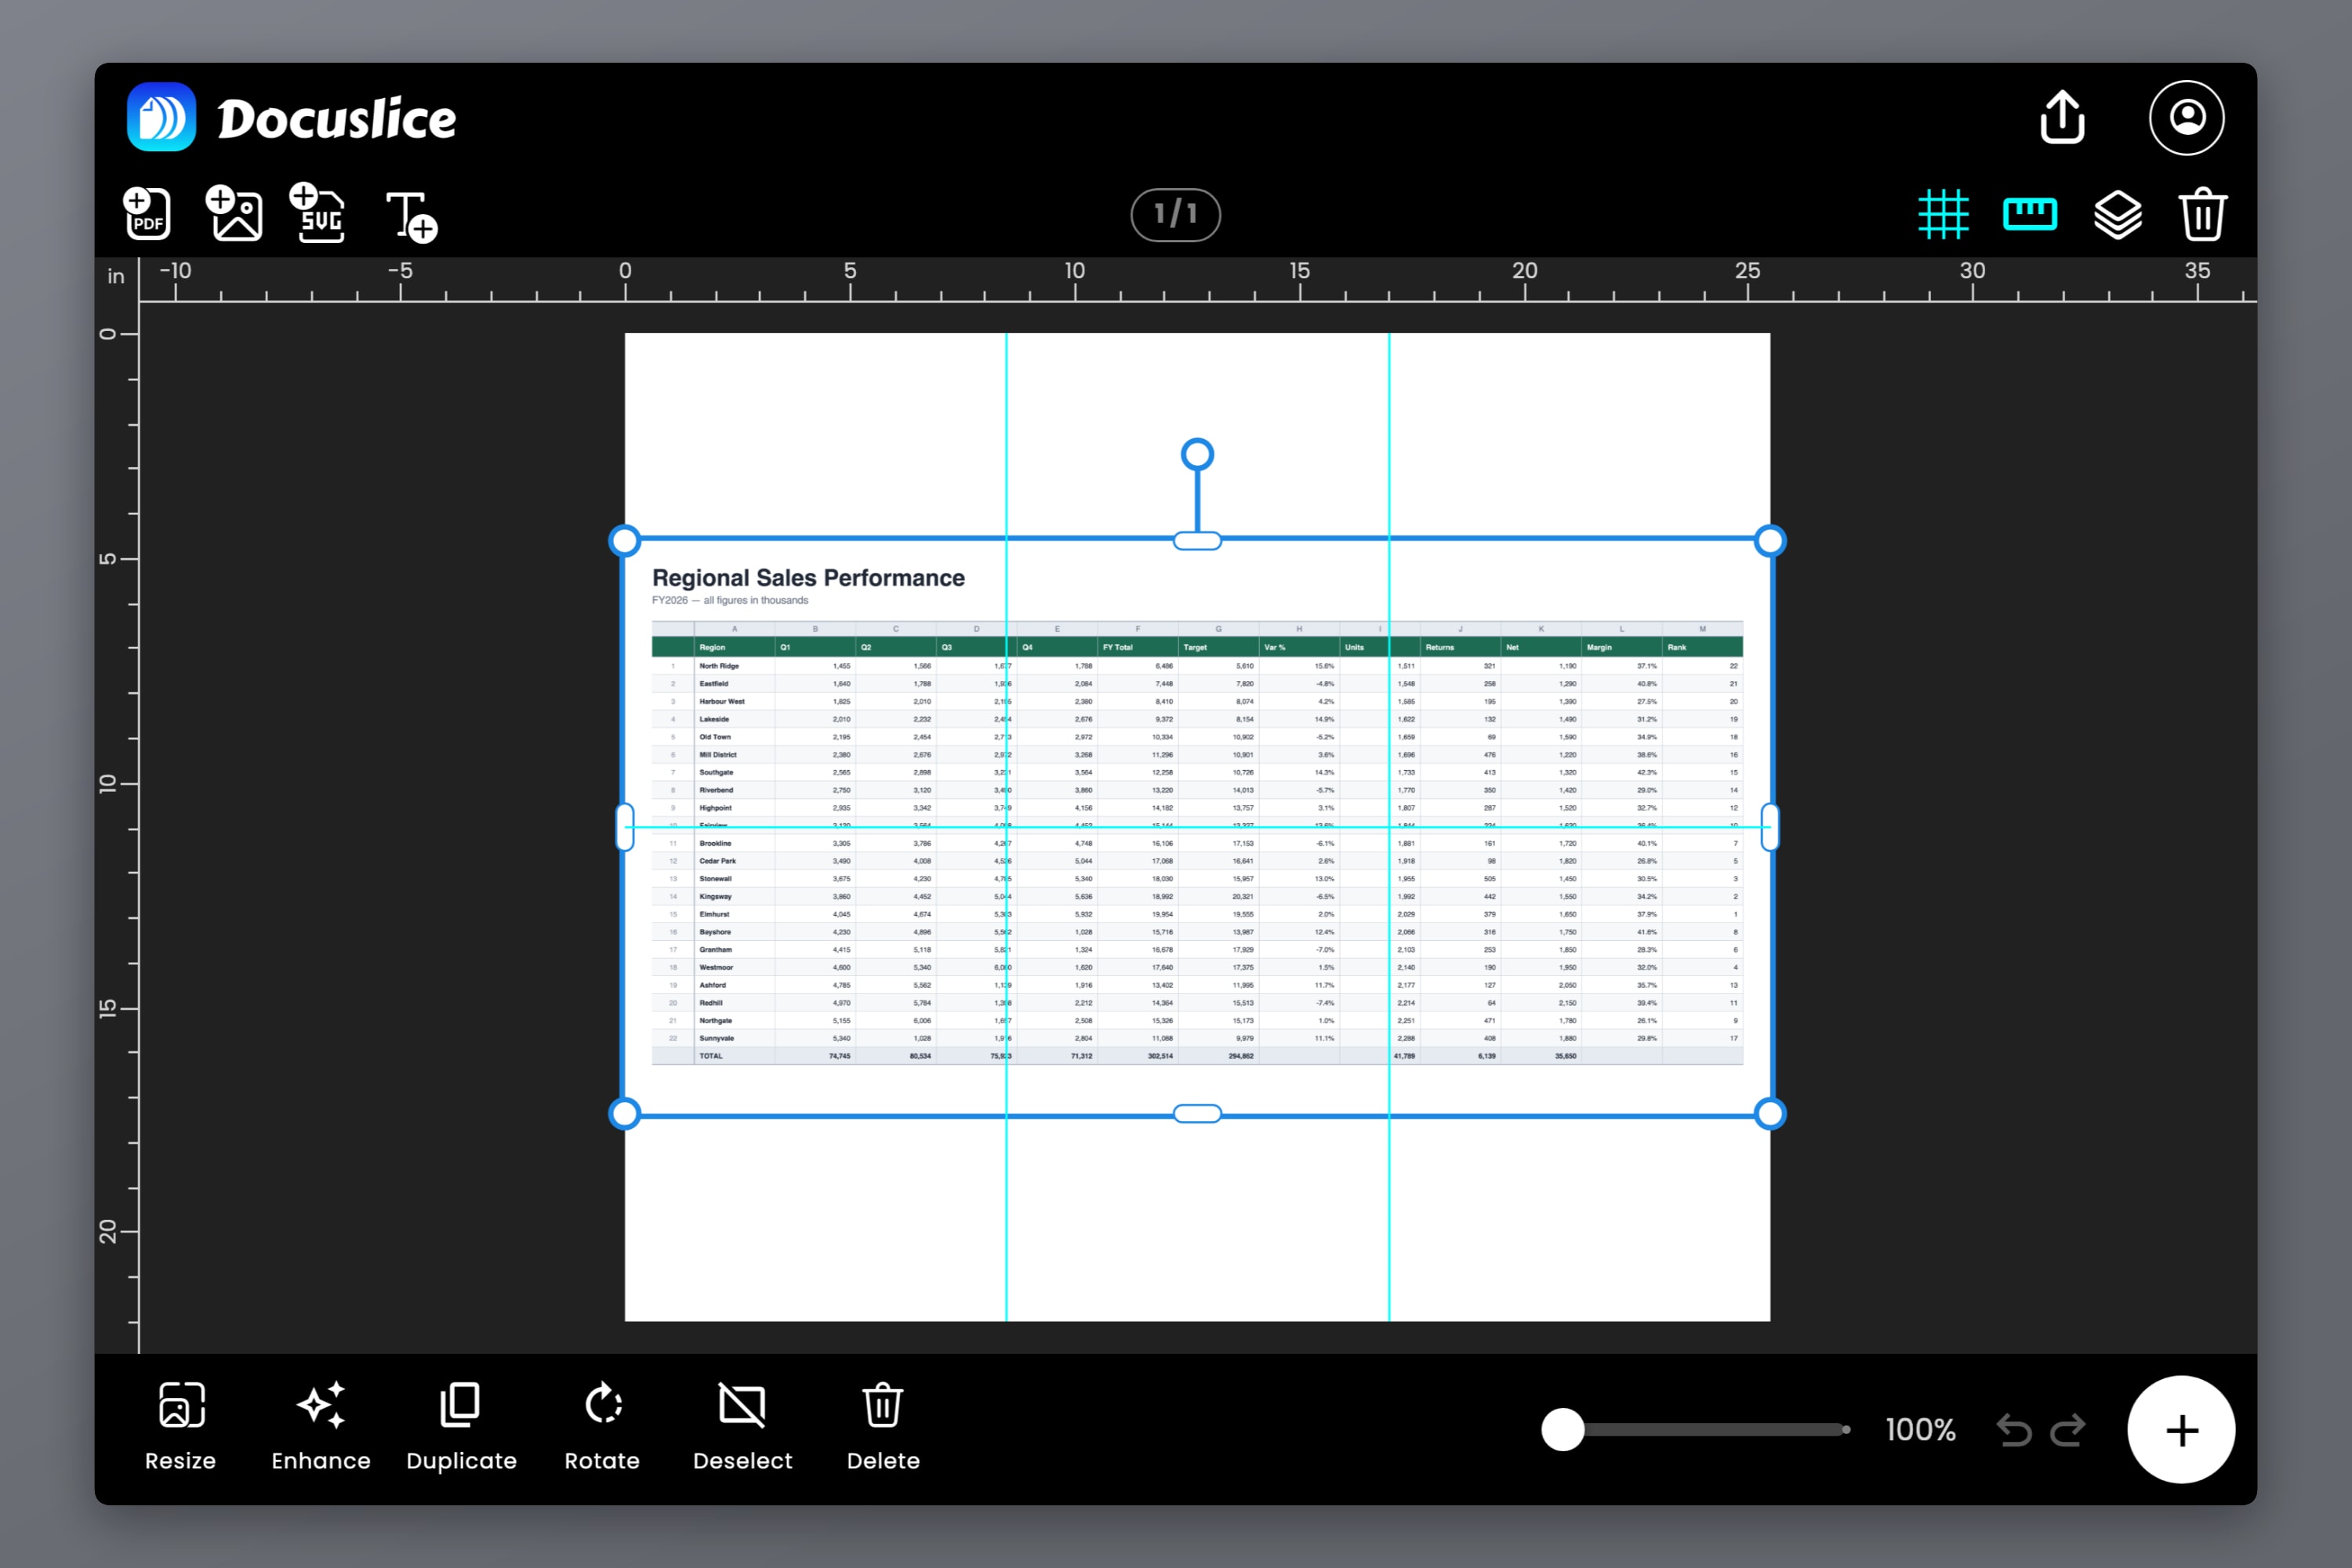
Drop the file onto the canvas in Docuslice and choose your paper: Letter, Legal, A1 through A6, A3+, Tabloid, Ledger, the photo sizes, or a custom size, in either orientation.
Step 3 — Set the finished wall size
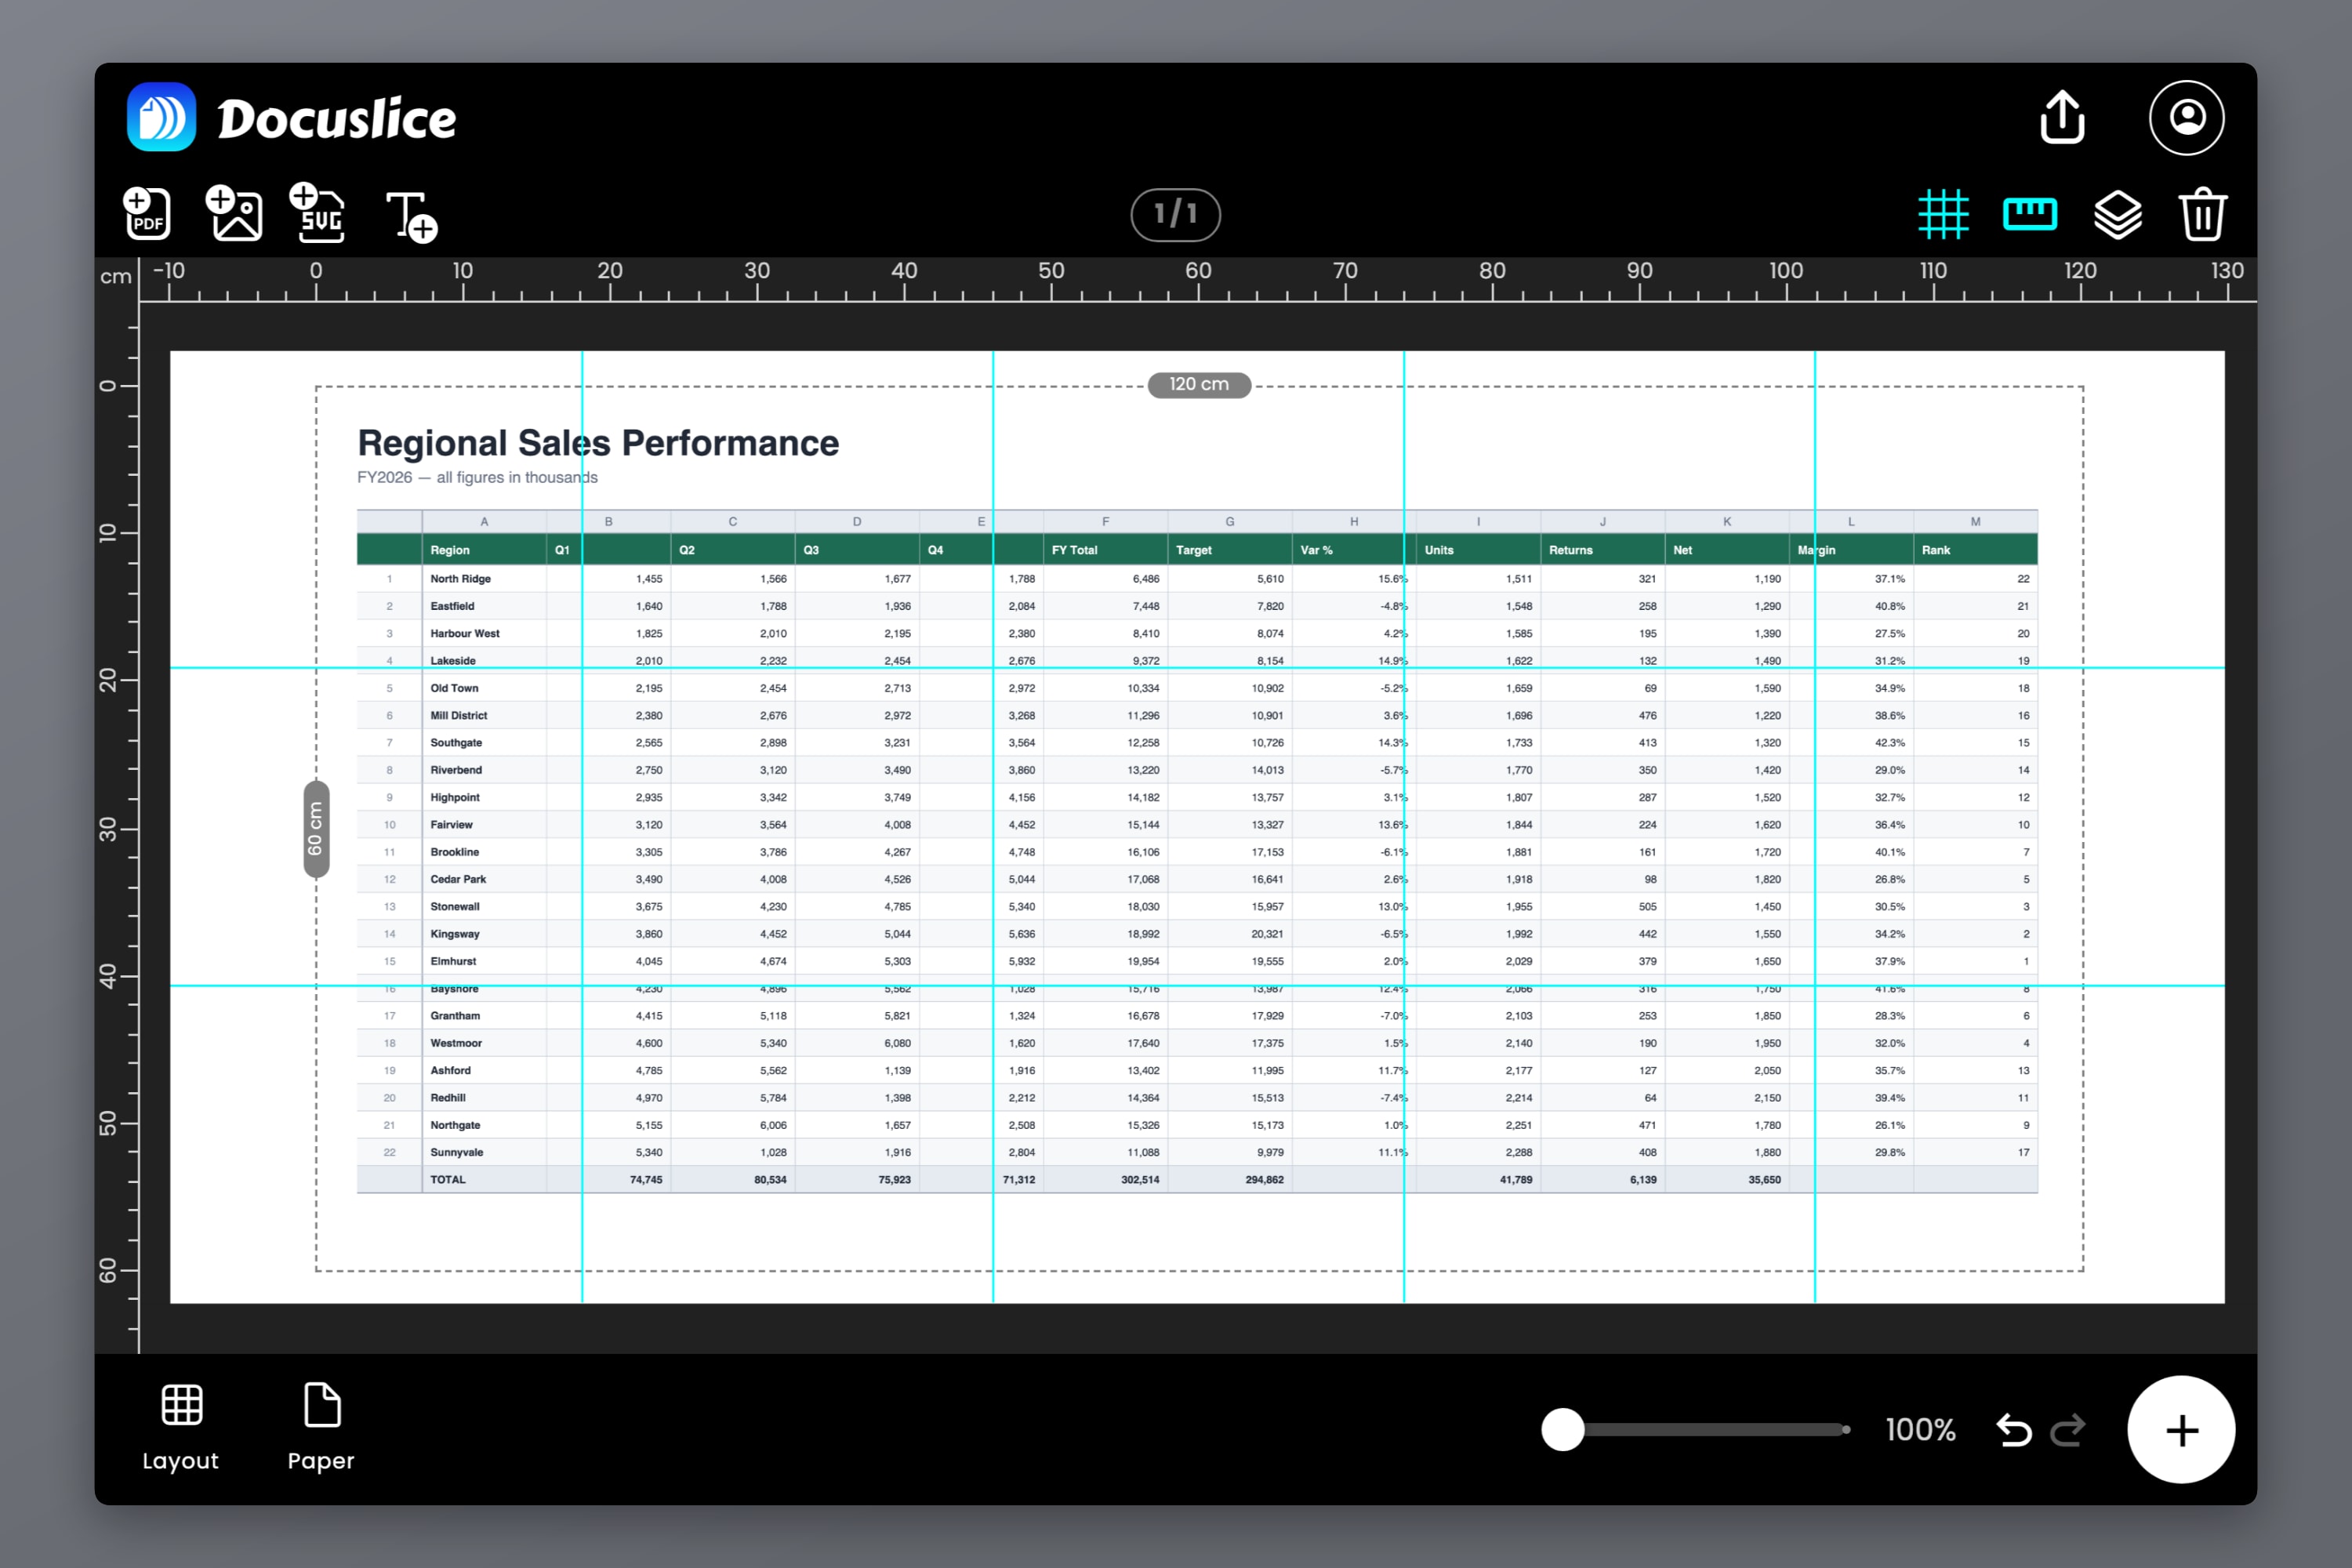
Switch to size mode and type the finished size in millimetres, centimetres, metres, inches or feet — what the wall needs, not a percentage. The tile grid redraws as you type. Grid mode works the other way round: nominate the number of sheets.
Step 4 — Overlap, page numbers, export
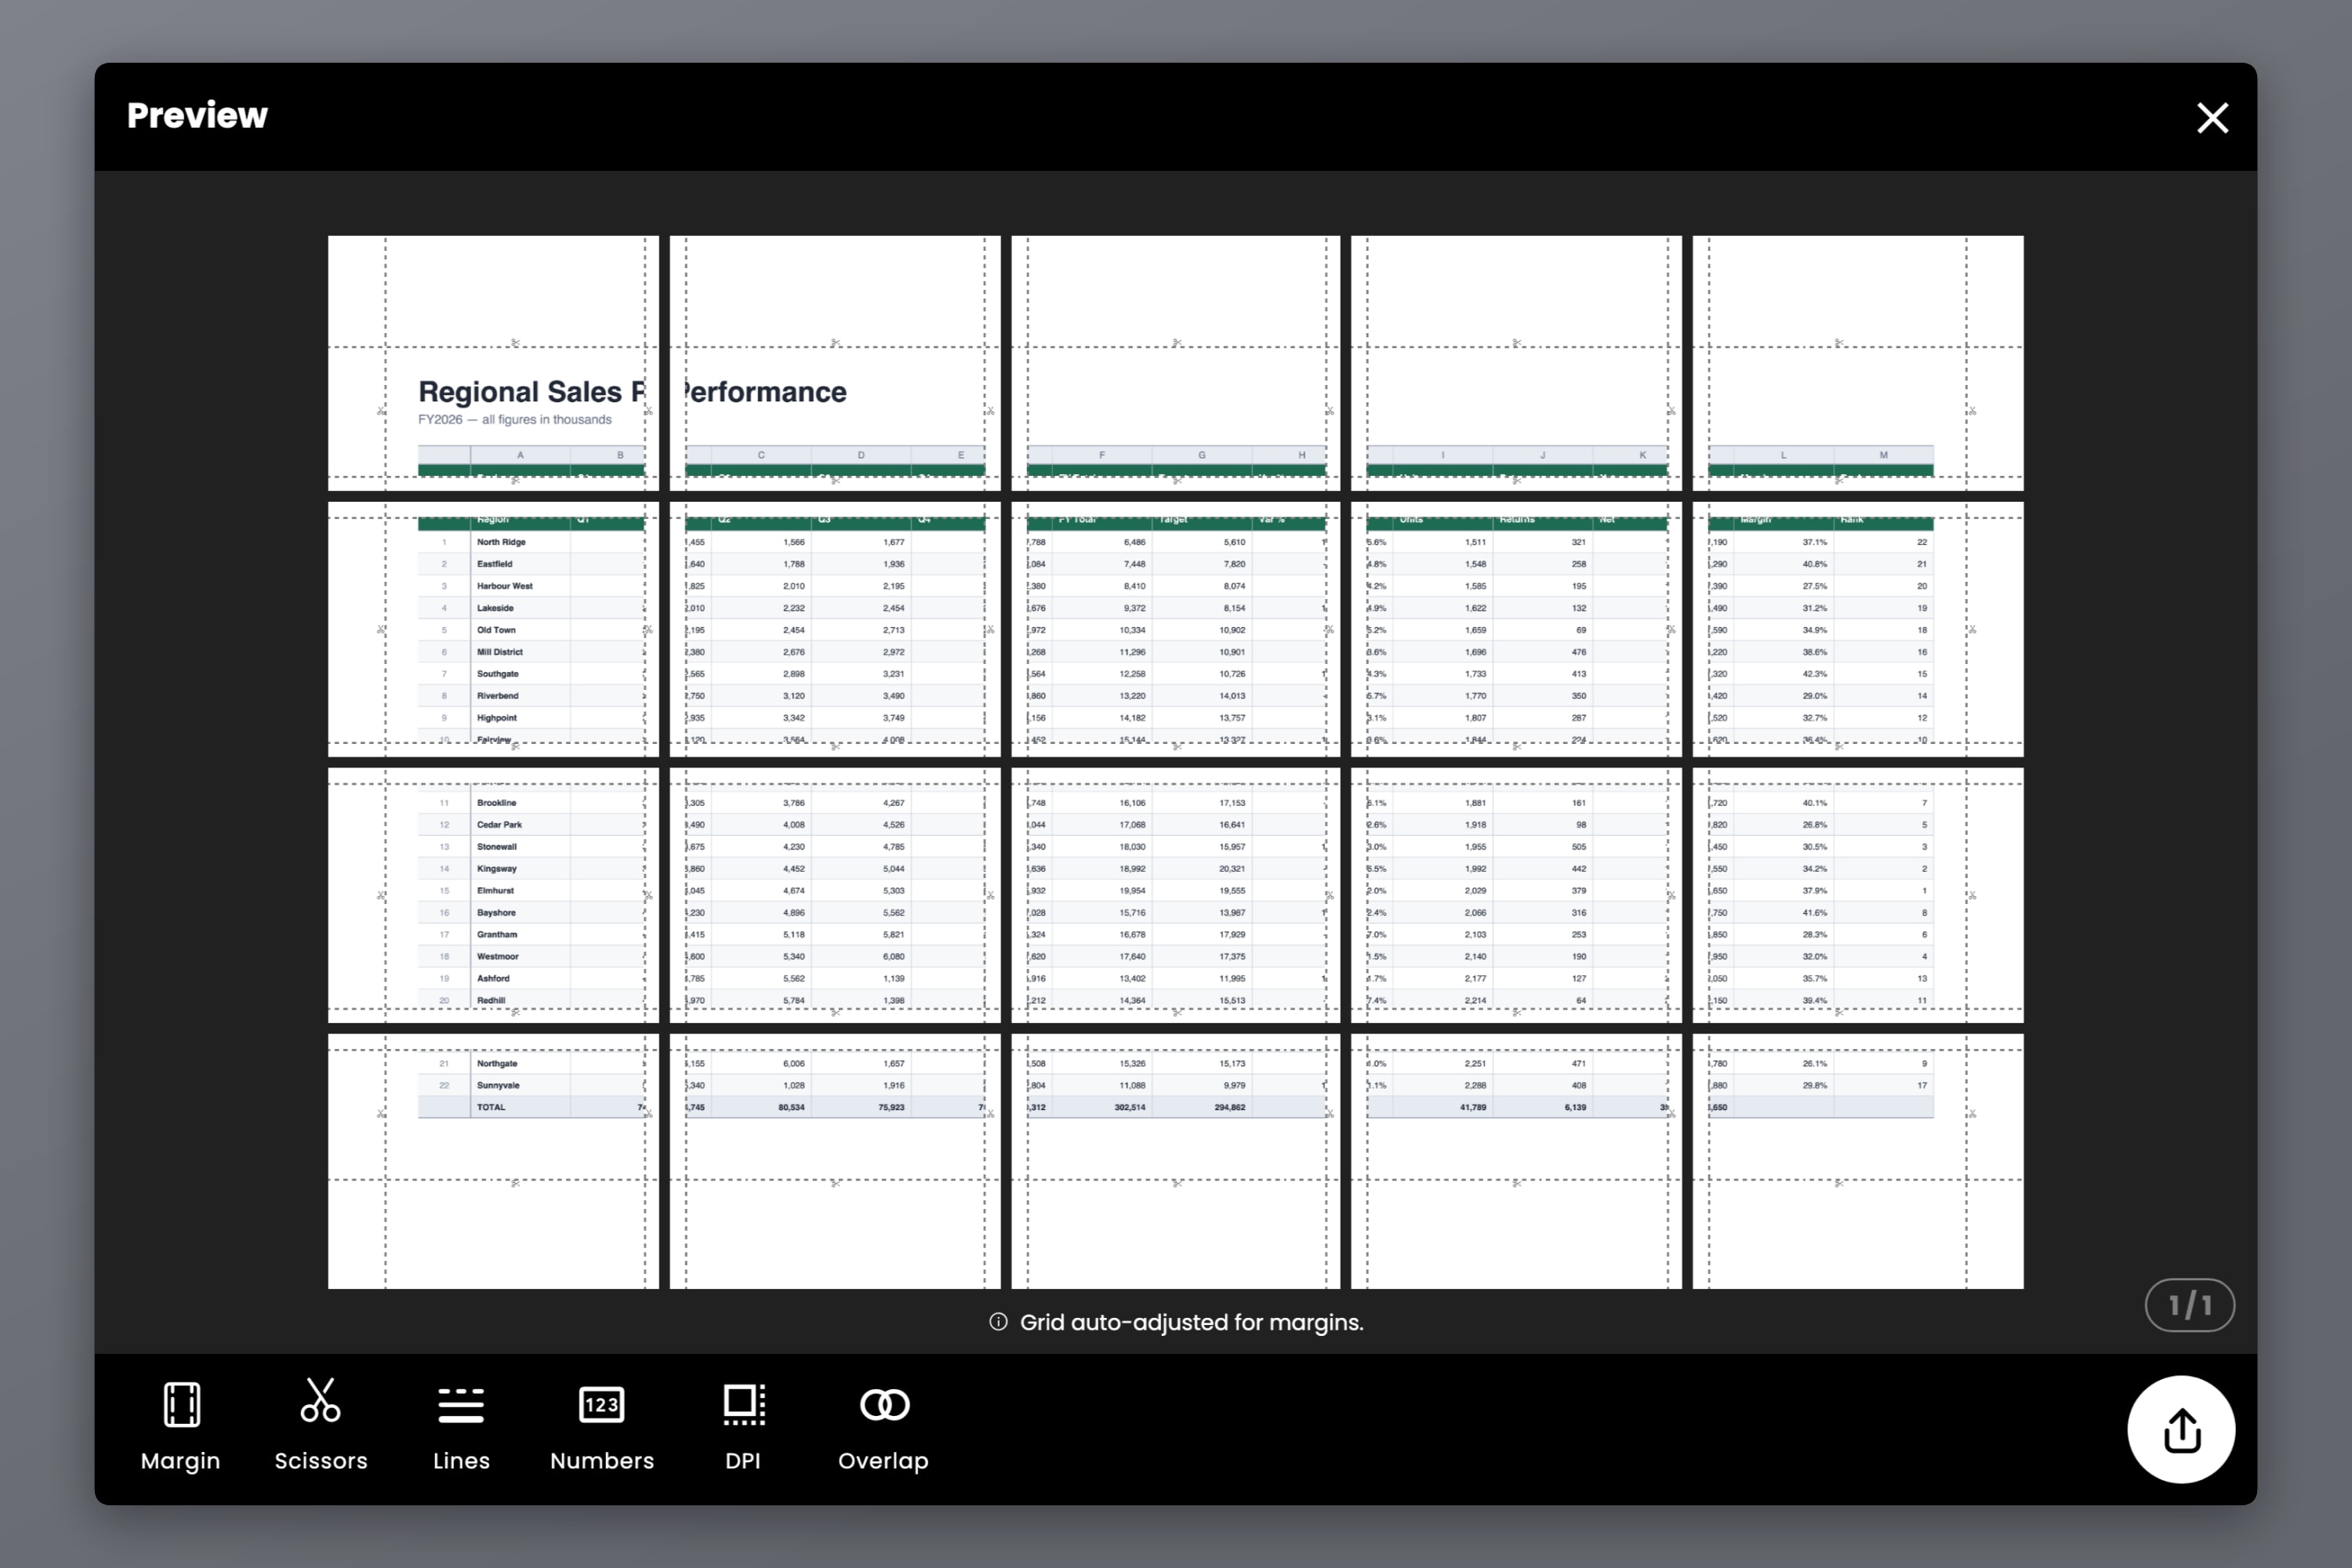
Set overlap — Off, 25%, 50%, 75% or 100% — so neighbouring sheets share a strip to trim and glue. Turn on cut lines and scissor marks, and page numbers so the stack reassembles: Column & Row, or Sequence. Then export as a tiled PDF or as images.
Via the PDF route, vector PDF export on Pro keeps the chart's lines and type as vector through the tiling instead of rasterizing them — what a wall chart of thin gridlines and small labels needs. Introducing Vector PDF Export in Docuslice covers how. Via the image route, export DPI is the control: Standard at 160 free, High at 300 and Max at 600 on the paid plans, one-time payments.
Docuslice runs in the browser, with apps for Mac, Windows, iOS and Android, and a free tier. How to Print a Large PDF on Multiple Pages walks the PDF path in full detail.
Frequently asked questions
Page Layout > Scale to Fit, set Width to 1 page and leave Height on Automatic. Every column lands on one page width, the rows continuing down as many pages as needed.
Page Layout > Print Titles, then in the Sheet tab set Rows to repeat at top to your header row. Freeze Panes does not affect printing — it is a screen-only setting.
Almost always a page break dragged outward, which forces Excel to scale the whole sheet down to fit. Check in View > Page Break Preview, or use Page Layout > Breaks > Reset All Page Breaks and set the scaling deliberately.
Microsoft documents three causes for the ribbon button being dimmed: a chart is selected, you are editing a cell, or no printer is installed. Click a normal cell first, then open Print Titles. Two more cases disable only the boxes inside the dialog — several sheet tabs selected together, fixed by clicking a single tab to ungroup them, and reaching Page Setup from File > Print instead of the Page Layout tab.
No. Excel's print engine paginates a document; it has no tiling, no overlap and no cut marks. Save the chart as a picture or export to PDF, then tile that file. An A1 wall chart tiles onto nine A4 sheets — eight by area, but the grid rounds up — and an A0 onto twenty-five at its exact ISO size of 841 x 1189 mm, or sixteen if you enter the canvas as 840 x 1188 mm. The full ladder is in Poster Sizes Explained; How to Print a Poster on Multiple Pages at Home covers assembling them.
Try Docuslice
Keep the spreadsheet printing in Excel — reach for Docuslice on the day the chart has to go on a wall.