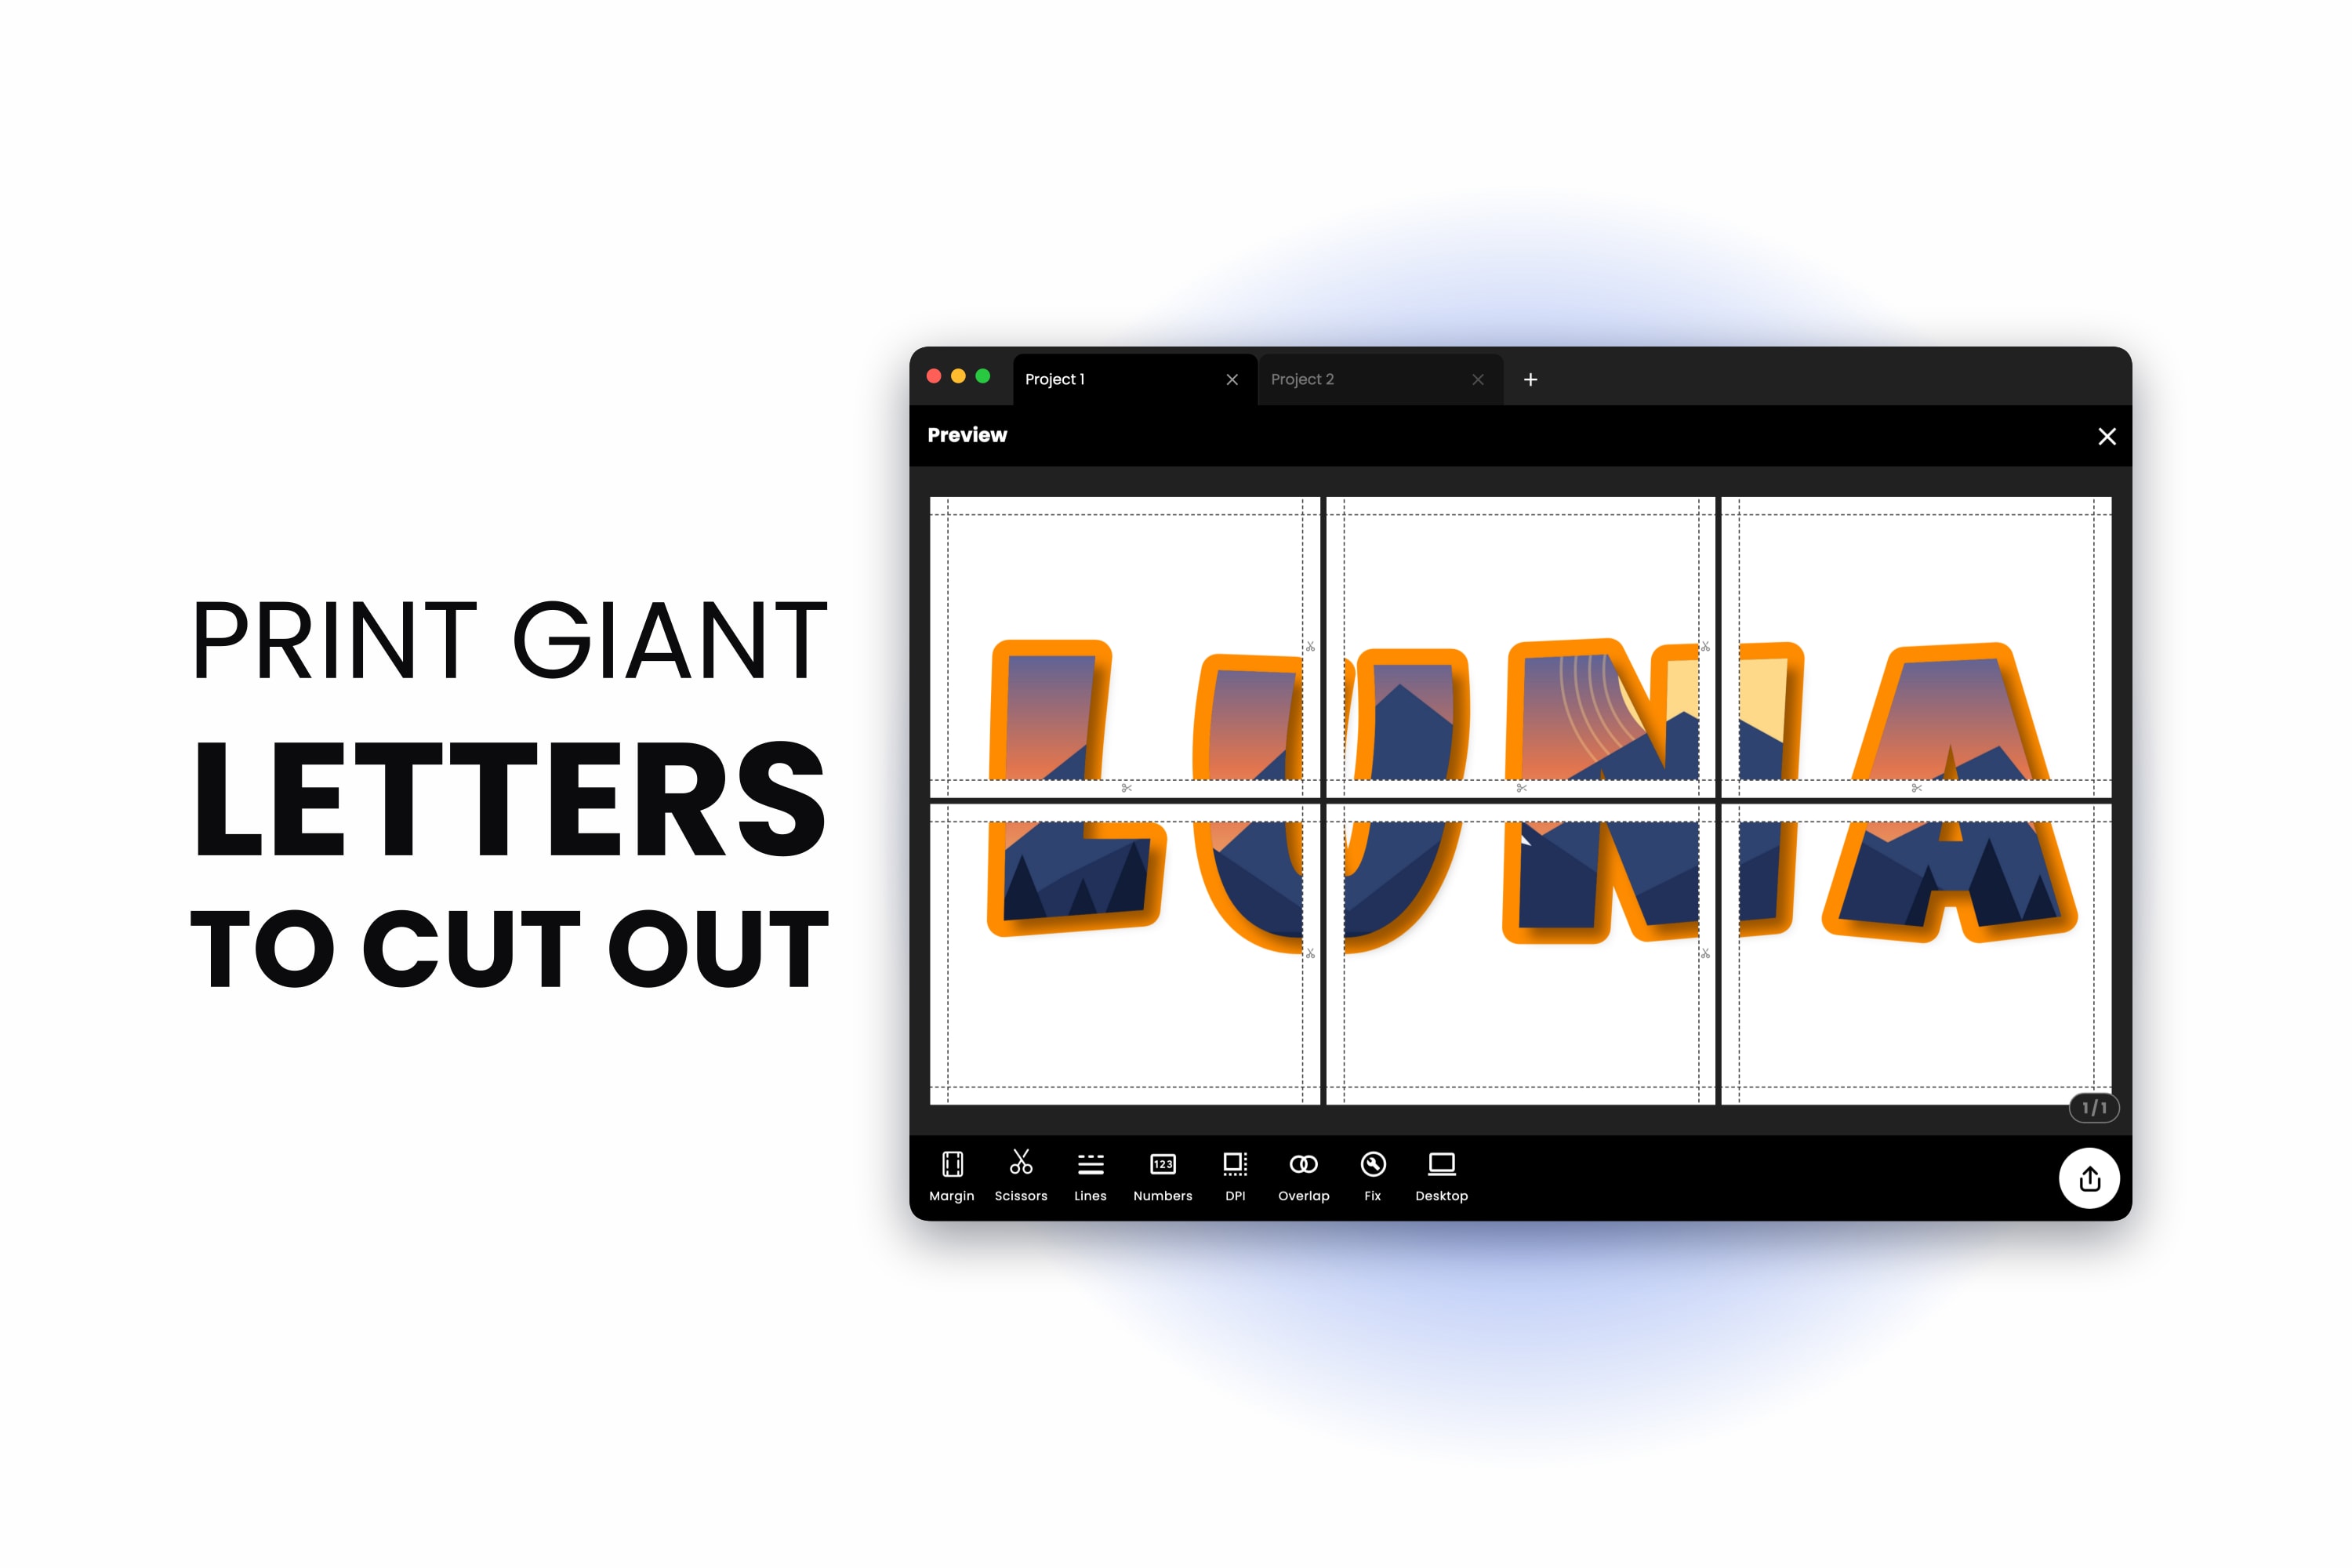
A name above a crib. WELCOME across a classroom bulletin board. A big gold 30 propped against the wall at a birthday party. Giant cut-out letters are one of the most common things people want to print big, and one of the most frustrating to buy: the right word, in the right size and the right color, is never on the shelf.
You can print them yourself on an ordinary A4 or Letter printer. Build the word at its real size, let Docuslice split it across as many sheets as it needs, print, tape and cut. This guide walks through every step — including the new outline, fill and mask tools that make the cutting part far easier, and let you fill your letters with a photo.
What You'll Need
- A printer that takes A4 or Letter paper.
- Paper or card. Ordinary paper works; heavier card stands up better on a wall, if your printer accepts it.
- Scissors and a craft knife, for the holes inside letters like A, O and R.
- Tape, for letters that span more than one sheet.
Step 1: Decide How Big the Letters Should Be
Start with the space, not the paper. Measure where the word will go and decide how tall each letter should be — 20 to 30 cm (8 to 12 in) reads well across a classroom, and a name over a bed can be smaller.
In Docuslice, create a project, open Layout and switch to Size mode. Enter the poster's width and height in centimeters, inches, feet or any of the other units. Make the height a little more than the letter height you want, and the width long enough for the whole word — you can fine-tune both once the word is on the canvas. A poster can be up to 5 m (about 16 ft) on each side, or 20 ft if you work in feet.
Then set your paper under Paper. Docuslice works out how many sheets the poster needs and shows the grid of sheets as you change the size.
Step 2: Type the Word in a Cutter-Friendly Font
Add a text to the canvas with the add-text button in the header, and type your word. Capitals are easiest to cut and read best from across a room.
Then open Font and choose a heavy, wide typeface. Thick strokes are forgiving with scissors; thin serifs and joined-up scripts are not. A few that cut well, all in Docuslice's free library of more than 1,900 fonts:
- Luckiest Guy — rounded and playful, great for kids' rooms and parties.
- Archivo Black — clean and bold, good for classrooms and signs.
- Bowlby One — very heavy, with wide letters that are easy to cut.
- Anton — tall and condensed, for a long word in a narrow space.
Two more adjustments make cutting much easier:
- Open up the letter spacing. Tap Spacing and drag Letter spacing up until no two letters touch. Every letter then cuts out on its own.
- Fill the poster. Drag a corner handle to scale the word, or a side handle to stretch it wider. Snap it to the center so it sits evenly on the page.
Step 3: Give the Letters a Cutting Outline
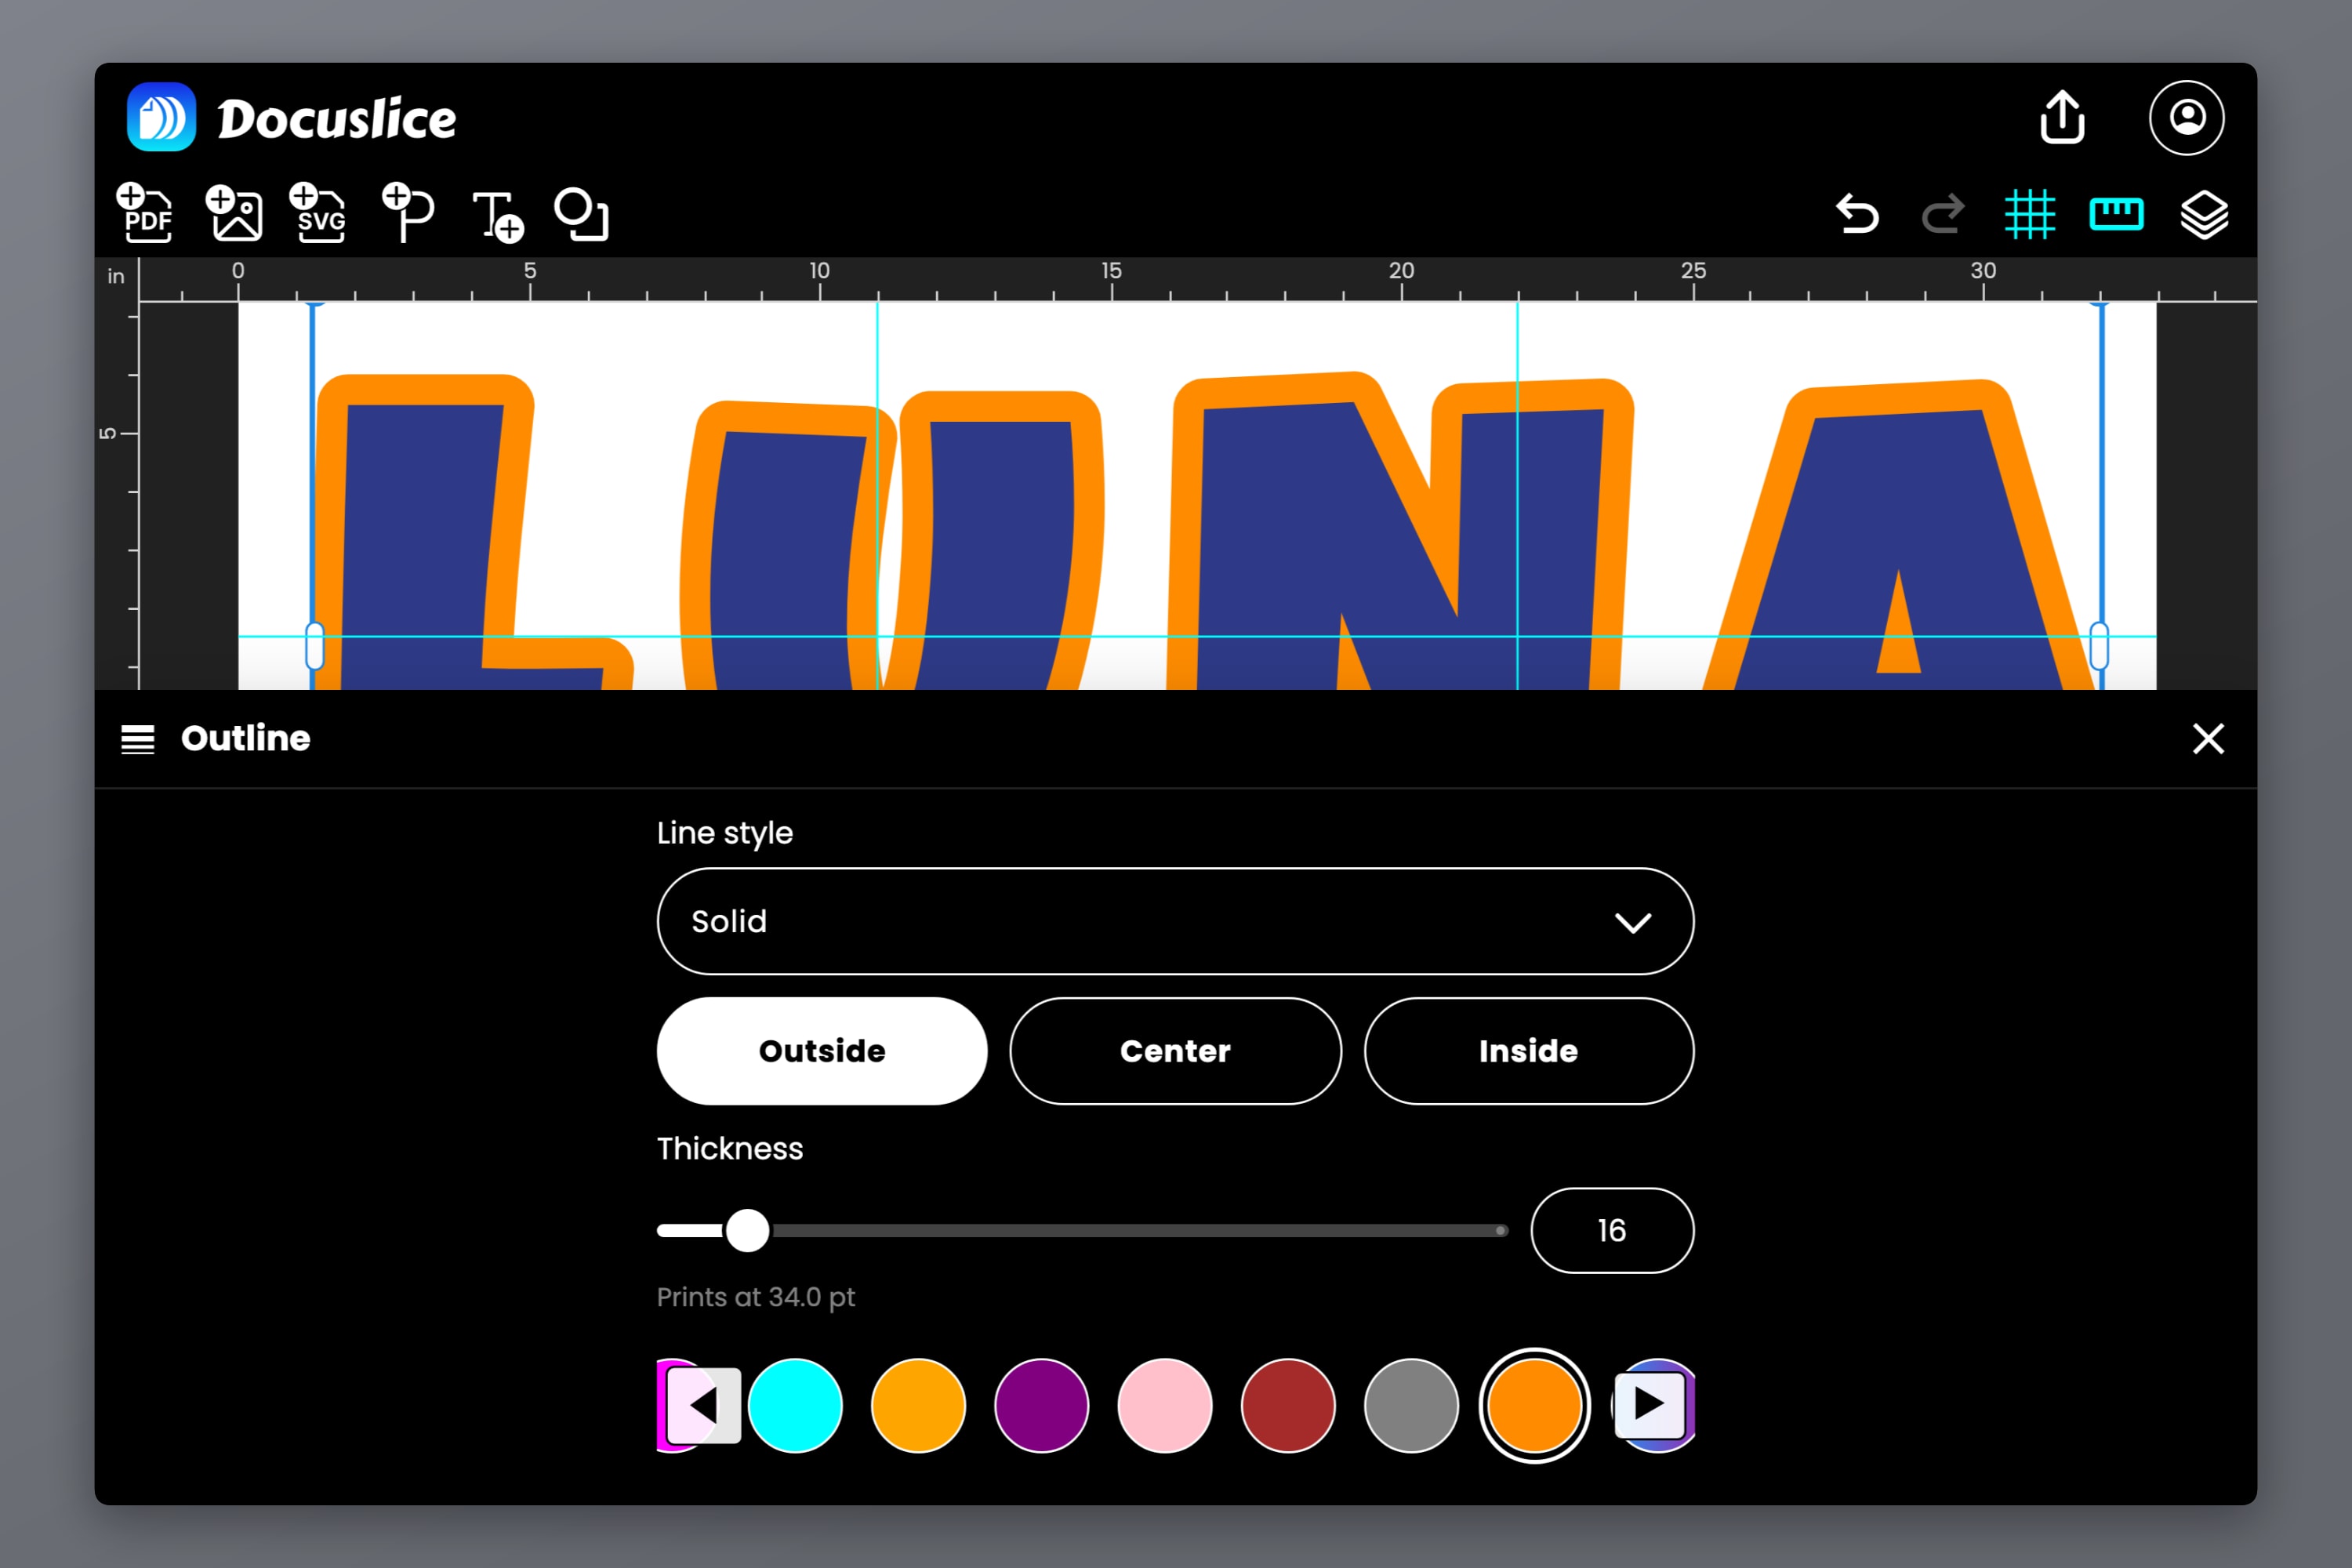
This is the step that turns a printed word into neat cut-outs. Select the text, tap Outline and pick a color.
- Choose Outside. The outline then sits around each letter rather than on top of it, so it never thins the letter itself.
- Raise the Thickness until there's a clear border. Under the slider, Prints at shows how thick the outline will be on paper.
- Cut along the outer edge of the outline. If your scissors wander a little, they wander into the border, not into the letter — and the colored rim makes the finished letters look deliberate, like stickers.
Prefer a "cut here" guide? Set Line style to Dashed or Dotted, and adjust the dash length and gap to taste.
Step 4: Choose How to Fill the Letters
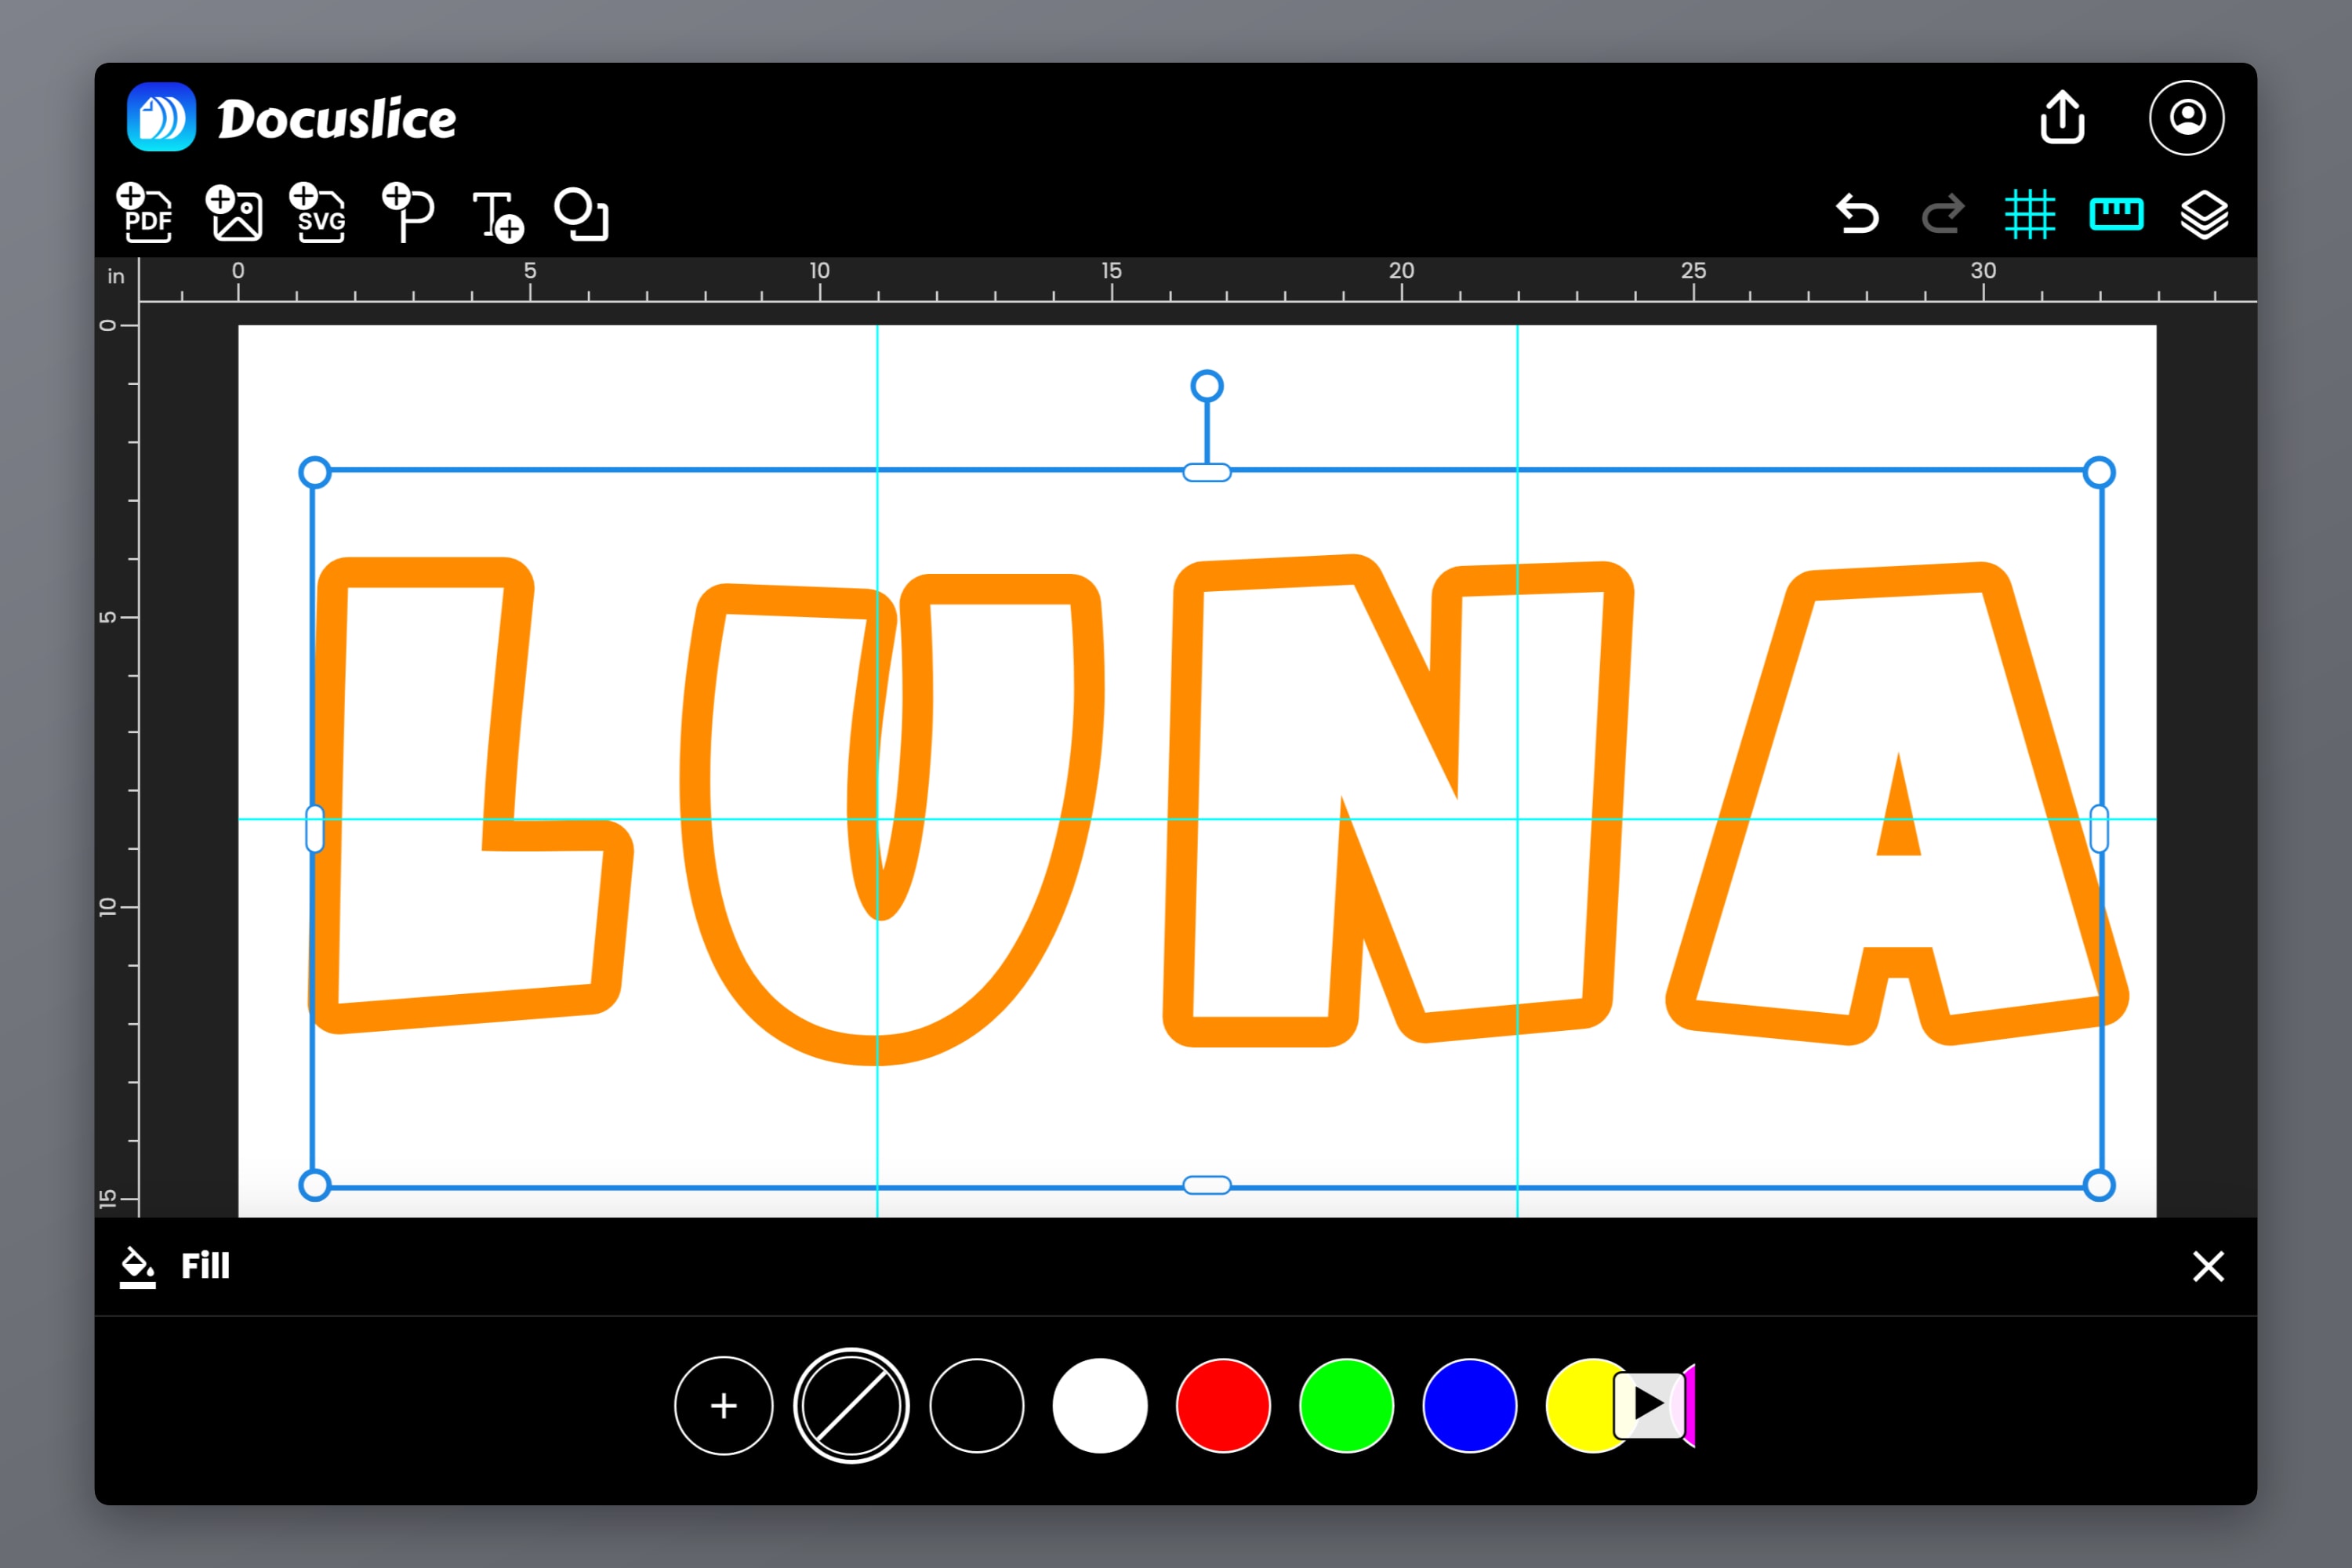
Tap Fill to choose what goes inside the letters.
- A solid color — tap any circle in the row, or + to mix your own on the Color sheet. Each color has an opacity slider too.
- A gradient — on the Color sheet's Gradient tab, add up to five colors and choose the direction.
- Nothing at all — tap None, the crossed-out circle. With an outline, you get hollow letters: perfect for children to color in, or for printing on colored paper with hardly any ink.
Step 5: Put a Photo Inside the Letters
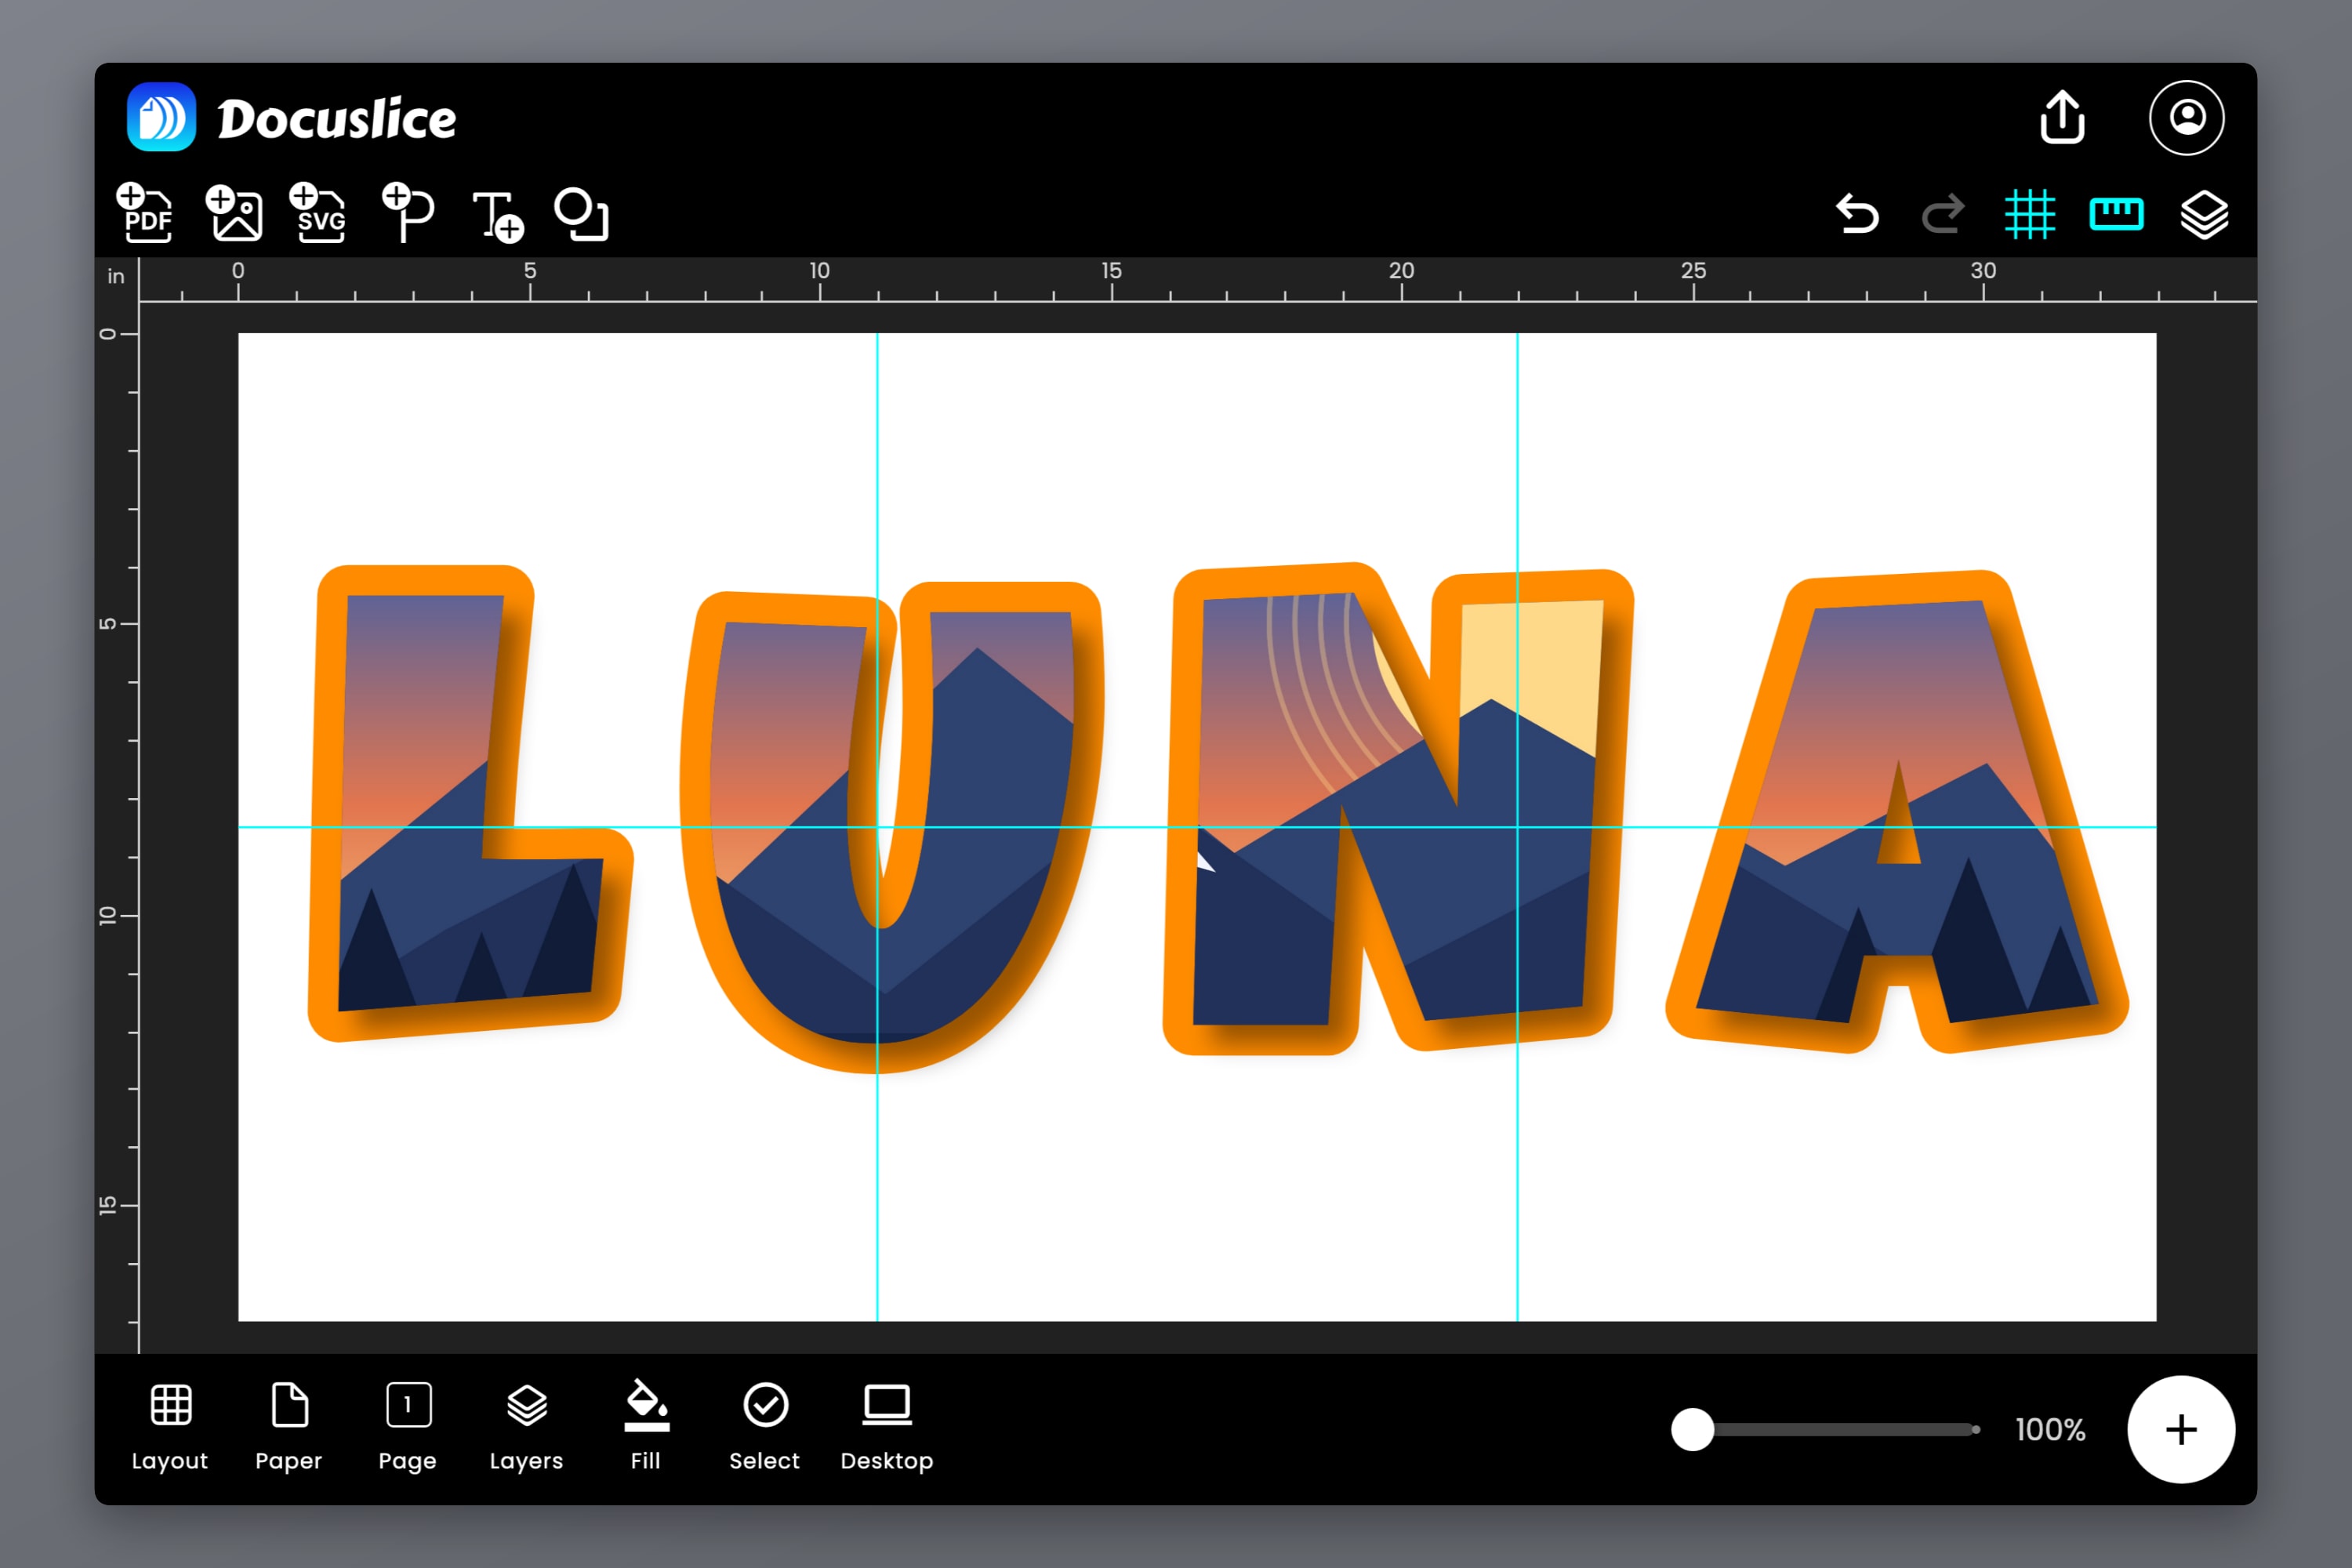
For a name made of beach photos, or a team name filled with the team, use the word as a mask: the photo shows only inside the letters.
- Want a border around the photo letters? Do this first, once the word is final. Tap Duplicate to copy the word, then select both copies — drag a box across them with a mouse, or tick both in Layers (··· → Select). Tap Position, then Left and Top, so the two sit exactly on top of each other. The lower copy keeps its outline and becomes the border.
- Add the photo with the add-image button. It lands on top of the word. Move and scale it until it covers the letters, and if it runs past the page, tap Crop to trim it to the word.
- Select the photo and the word together. Once the photo covers the word, a tap or click only reaches the photo, so use Layers: with nothing selected, open Layers, tap ··· → Select, and tick the photo and the word. With two copies of the word, tick the upper one. Then close Layers.
- Tap Use as mask. The word must be the lower of the two, which it is if you added the photo after it.
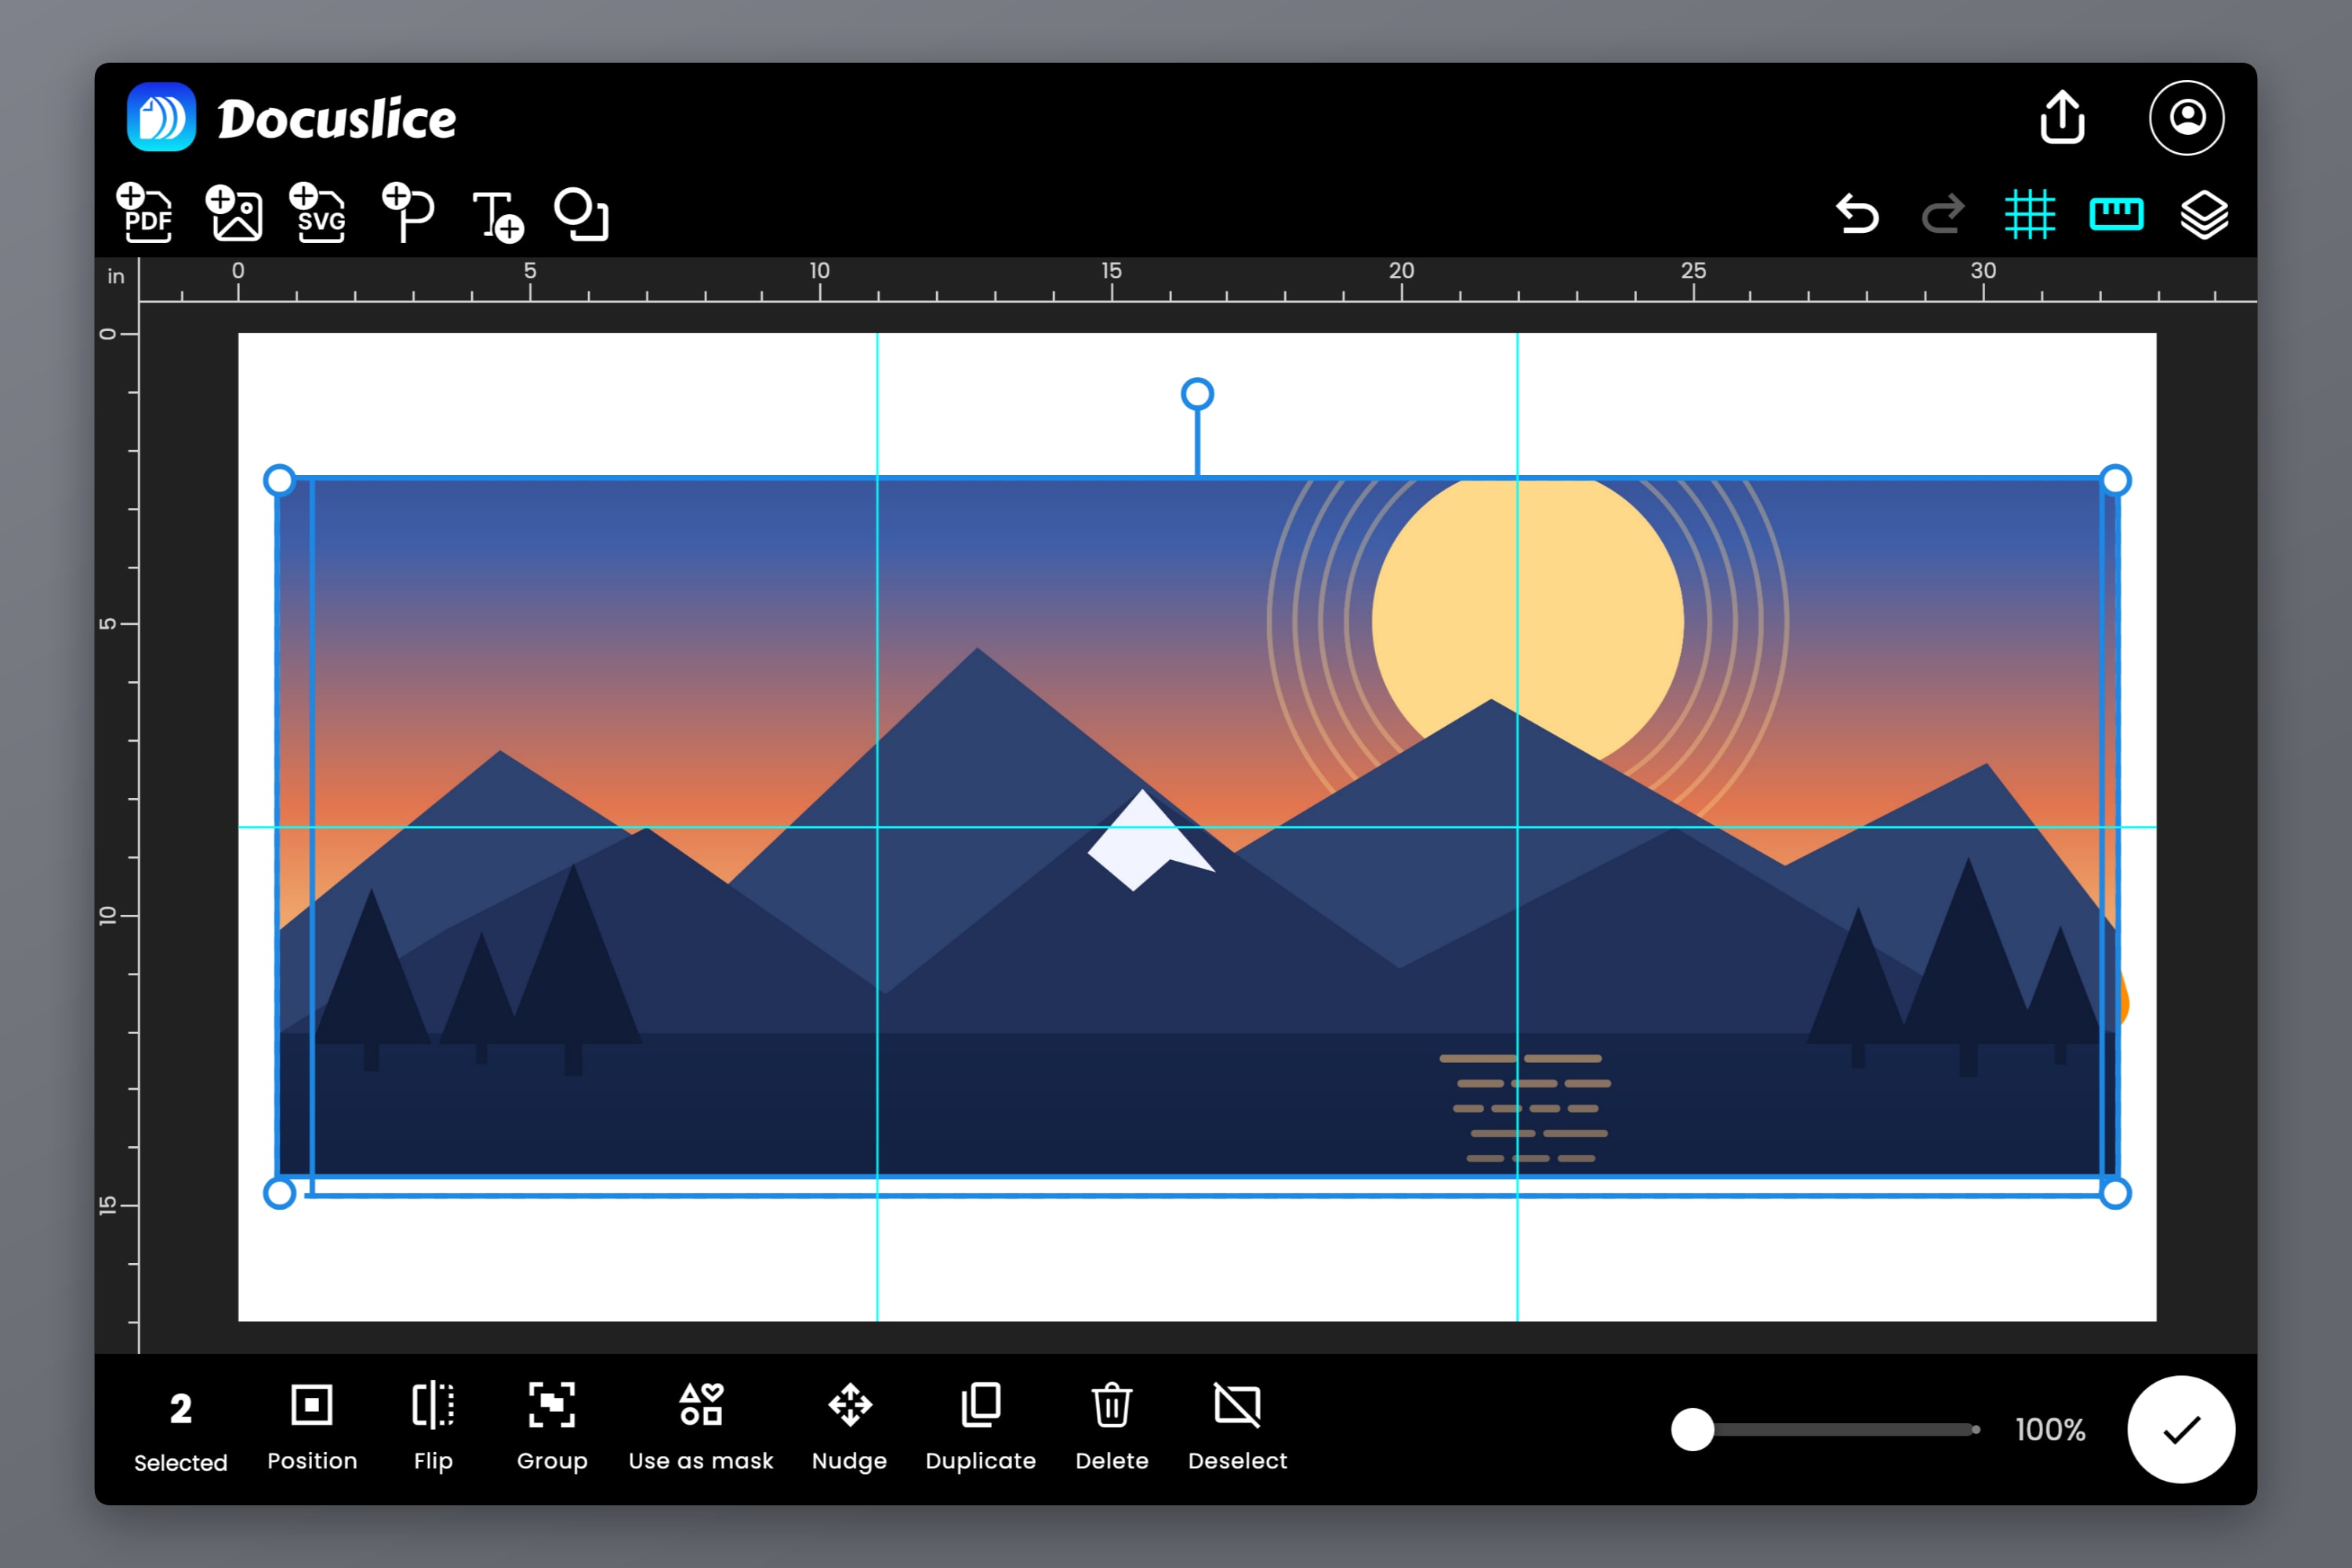
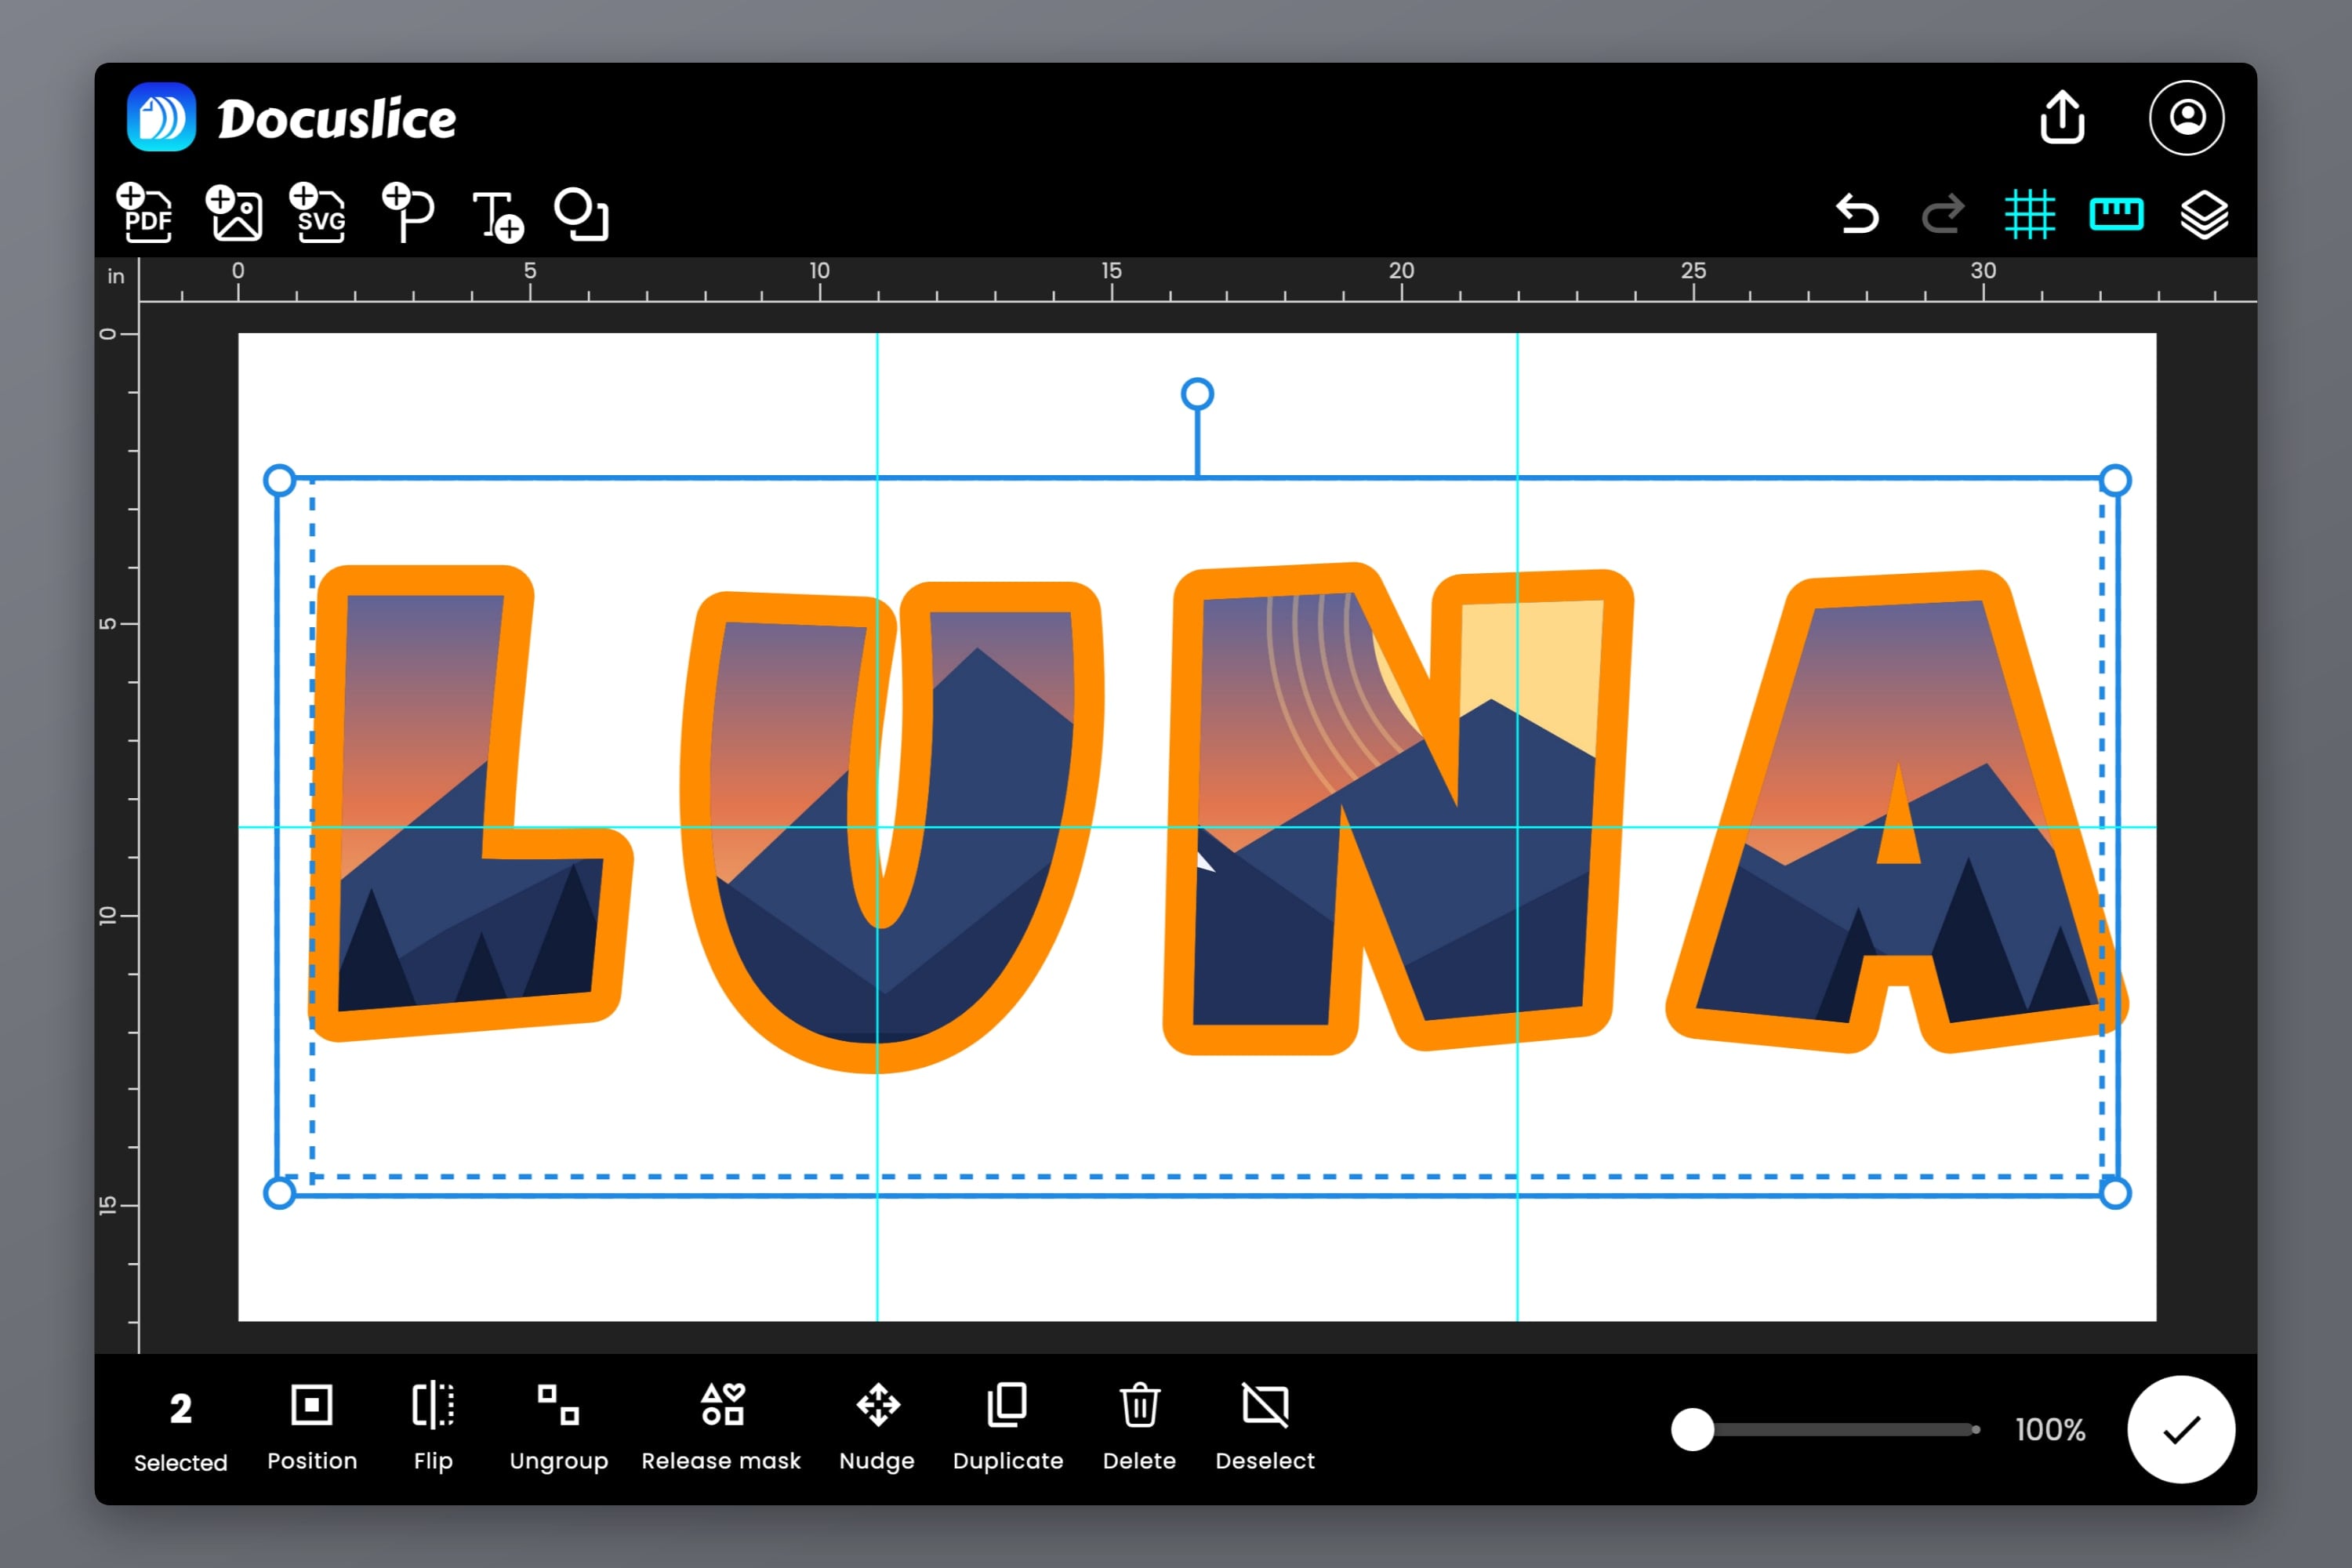
The photo now shows only inside the letters. The word and the photo become a group: tap it once to select the whole thing, and tap again to go into it and move or scale the photo inside the letters.
A word used as a mask doesn't draw its own color or outline — its letters only decide where the photo shows — which is why the copy underneath carries the border. To reach the word itself, open Layers and tap the row named Mask inside the group. Changed your mind? Select the group and tap Release mask.
Step 6: Add a Drop Shadow (Optional)
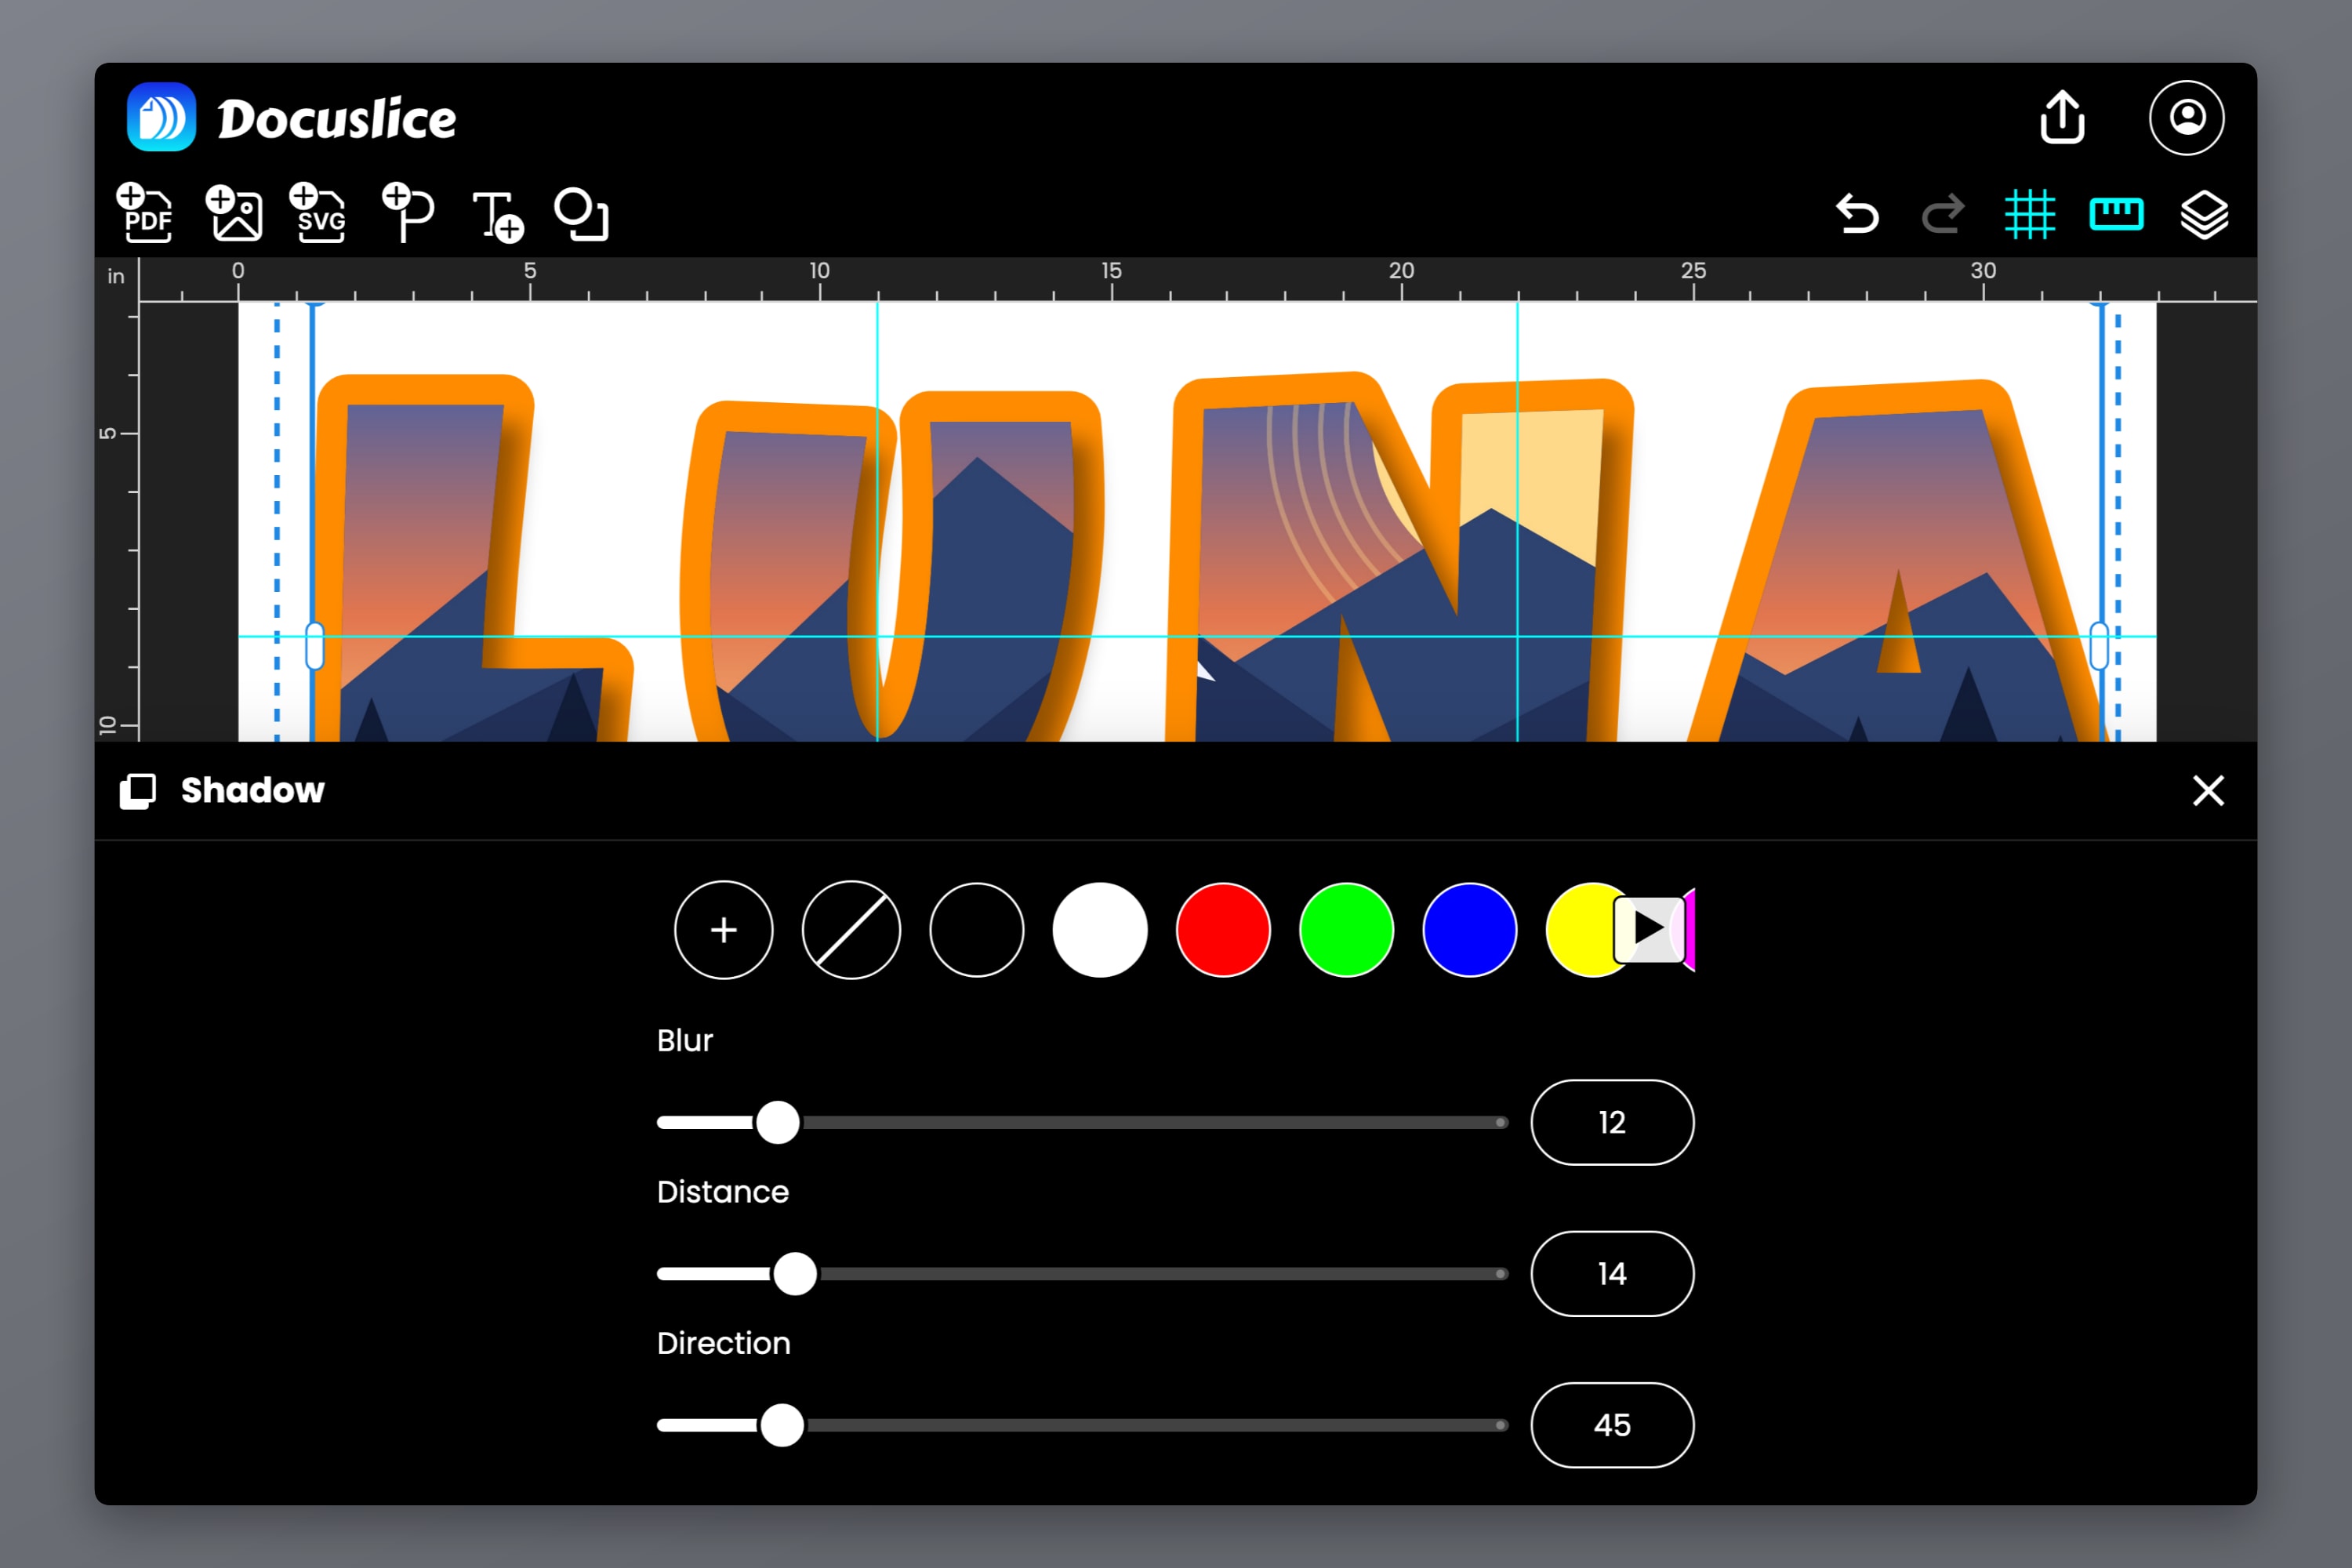
A shadow lifts the letters off the page in photos and on screen. Select the text, tap Shadow and pick a color, then set the Blur, Distance and Direction.
For photo letters, open Layers and tap the group's Mask row to select the word, then tap Shadow: its shadow falls under the photo, in the shape of the letters. If you'll cut the letters out, keep the shadow short and sharp, and cut around it — it becomes part of each letter's shape.
Step 7: Check Where the Sheets Divide
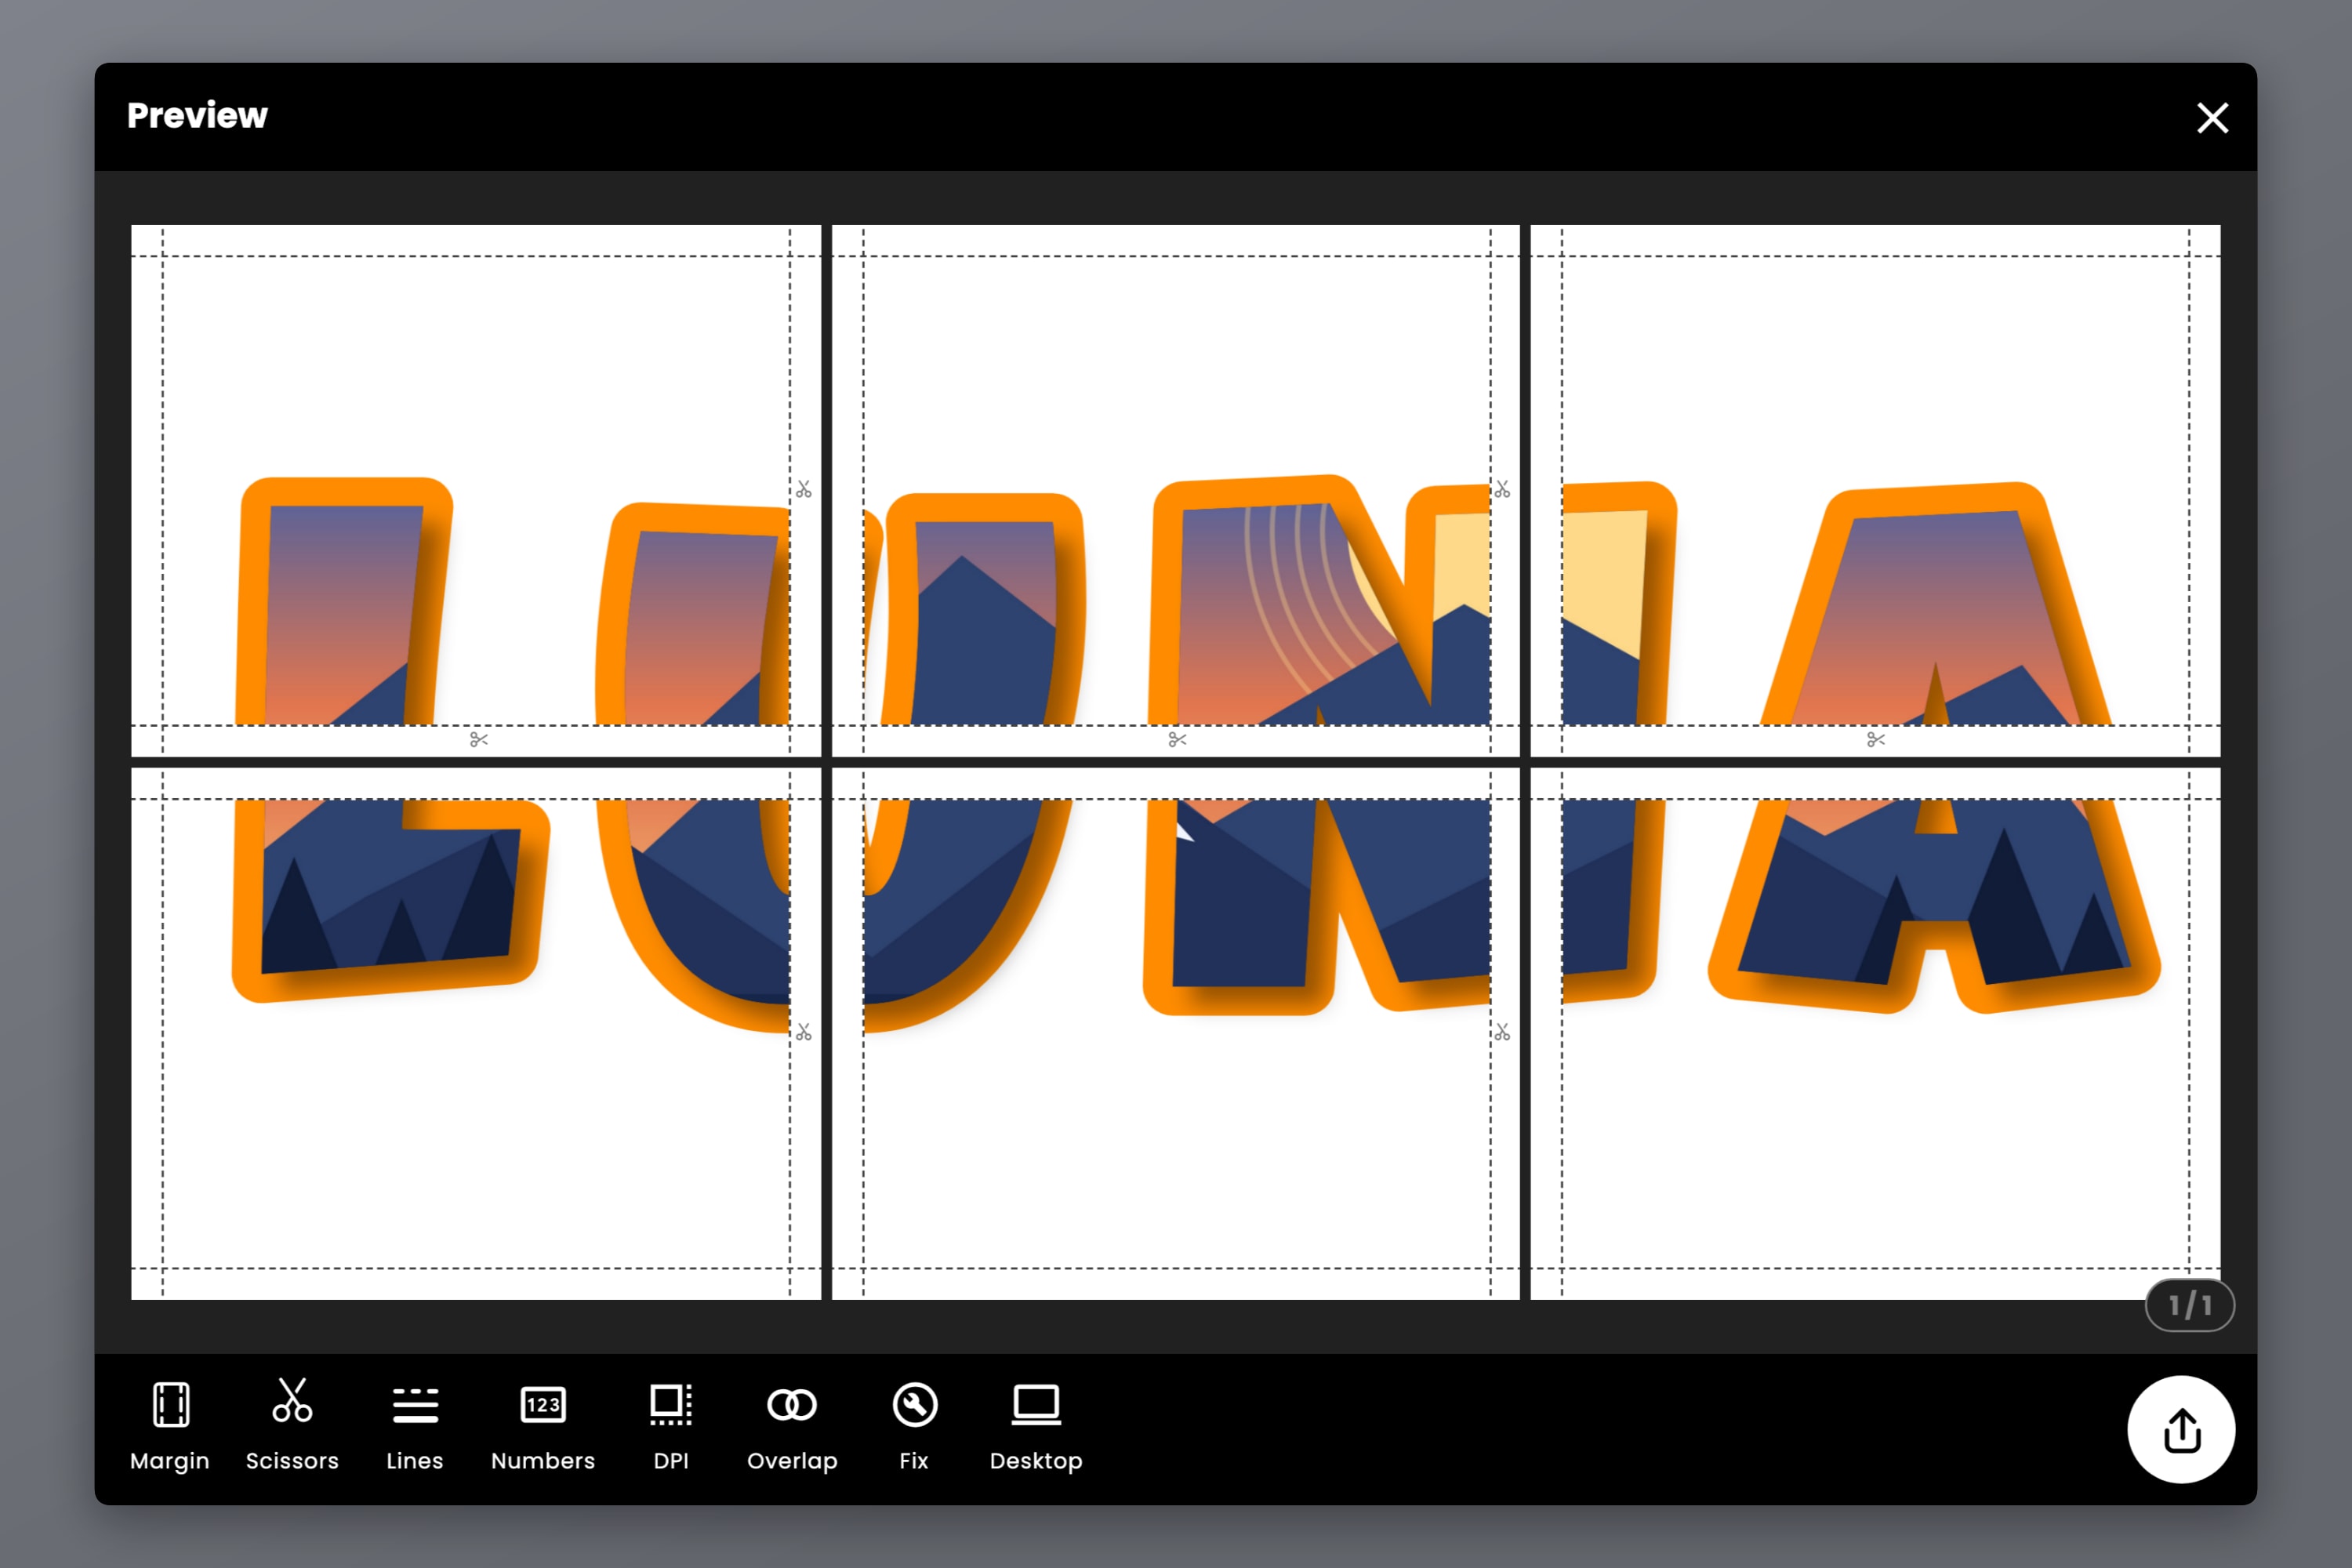
Docuslice draws the tile dividers on the canvas, so you can see which sheet each letter lands on before you print.
- Letters smaller than a sheet? Move them, or adjust the letter spacing, so each letter sits inside one sheet. Then there's no taping at all — just print and cut.
- Letters bigger than a sheet? That's fine. Avoid a divider that runs right along the edge of a stroke, where a small taping error shows; a divider straight through the middle of a wide letter is easy to hide.
Step 8: Export With Cut Lines and Page Numbers
Open the export preview. It shows every sheet before you use any paper.
- Lines prints cut lines, marking where each sheet's margin ends, so the sheets of one letter join up cleanly.
- Numbers prints page numbers, so you know which sheet goes where. With a whole alphabet of letters on the table, you'll be glad of them.
- Overlap, on the paid plans, repeats a strip of each neighbor's artwork in the margin, so a cut that lands a little short never leaves a white gap.
Export a PDF or images. With Vector PDF on Pro or Pro+, the letter shapes and their outlines stay razor-sharp at any size.
Print at 100% or Actual size — never "Fit to page", which shrinks every sheet and stops them lining up.
Step 9: Tape First, Then Cut
- Lay out each letter's sheets in order, using the page numbers.
- Tape them on the back. Trim the margin off one edge of each join, line the artwork up, and tape along the seam from behind.
- Cut the letter out, along the outer edge of the outline. Scissors are fine for the outside; a craft knife on a cutting mat gets the holes inside A, B, D, O, P, Q and R clean.
- Make them last. Glue the letters onto card or foam board for a wall, or laminate them to reuse for next year's party.
Frequently Asked Questions
A heavy font with thick strokes and simple shapes: Luckiest Guy, Archivo Black, Bowlby One or Anton are all good choices, and all free in Docuslice. Avoid thin serifs, hairline strokes and joined-up scripts — they're slow to cut and tear easily.
As big as your wall. In Size mode a poster can be up to 5 m (about 16 ft) on each side, or 20 ft if you work in feet, and Docuslice splits it across as many sheets of A4 or Letter as it takes.
Yes, if the letters are smaller than a sheet. Watch the tile dividers on the canvas and move the letters, or open up the letter spacing, until each letter sits inside one sheet. Then you only cut — no taping.
Select the text, tap Fill and choose None (the crossed-out circle), then give it an outline with Outline. You get hollow letters that use very little ink — ideal for a classroom activity.
Add the photo on top of the word, tick both in Layers (··· → Select), and tap Use as mask. The photo-inside-text guide covers it step by step.
A word used as a mask only decides where the photo shows; its own color and outline aren't drawn. For a border around photo letters, duplicate the word before masking, line the two copies up with Position, and use the top copy as the mask — the outline on the lower copy becomes the border.
Ordinary printer paper is fine for a one-day party. For letters that stay up for a term or a season, print on light card if your printer takes it, or glue the letters onto card or foam board after cutting.
Yes. Shapes, outlines, fills, masks and shadows are free on every plan, and so is unlimited tiled printing. The paid plans add Vector PDF export, higher export resolution and overlap, and remove ads. They're one-time payments, not subscriptions.
Yes, start to finish. The iOS and Android apps have the same text, outline, fill and mask tools. To select two things at once on a phone, press and hold one, then tap the other.
Download Docuslice
Measure the wall, pick a chunky font, and your letters can be on it by this afternoon.